Tuesday, August 30, 2011

Domestic Charm


Recently I met Katelyn from the blog Domestic Charm.   Her blog is absolutely adorable!  Here is a little info about Katelyn and her blog.  She also has an Etsy shop!


I am a wife and mom of two little boys. I love Jesus and I love my family! I am always on the look out for new and fun kids crafts and in my free time I enjoy being creative in other areas. I love cooking, baking, cake decorating, party planning, organizing, DIY projects, and the list goes on. I like to share what I am up to on my blog along with what's inspiring me along the way. I sell some of my projects in my Etsy shop. What I sell is always changing so take a look!

Here are some of my favorite projects on Domestic Charm:

I am lovin' this cute wire basket organizer!

Yumminess!  Oreo Cup Cakes!  Those Cup Cake wraps are so cute:)

Check out this cake Katelyn made for her SIL's shower!  She includes a tutorial on how to make gum paste flowers.  This cake is gorgeous, huh?

I love finding new blogs to stalk, so you should go check out Domestic Charm!

Sunday, August 28, 2011

Fall Ruffle Purse

I am in LOVE.  Really.  I get excited this time of year for FALL and want to start decorating, making stuff in all the FALL colors.  While perusing the internet, I came across this absolutely stunning purse!

It is so pretty and just perfect for those FALL outings.  I. must. have. it.
See what I'm sayin'?  Those ruffles are just calling me.  I love the color as well!
You can find the tutorial here.

Can you believe it's almost September?  I am getting really excited for school to start!  Wahoooooooo:)

Thursday, August 25, 2011

Pinterest: Fall favorites

I am a Pinterest addict!  I can't get enough of it.  It is great for finding craft ideas, holiday ideas, fashion ideas....you name it!  Today I typed in Autumn vintage, and here's what I came up with:

Lovin' these FALL colors:)


I am i L.O.V.E. with these cute little acorn candles.  Aren't they adorable?

Don't these look yummy?  

Cute, cute headband!  Love the fabric.

If I was married in the Fall, I would so want this wedding cake!

Cute Autumn decor for a shelf....


I am in love with this jacket.  I want it.....NOW.

Isn't this scene breathtaking?  This is my favorite part of FALL.

Wednesday, August 24, 2011

Halloween Wood Plank Art

I can't believe I am actually working on Halloween crafts in August!  Remember all that Vinyl lettering I am still trying to use up?  Here is one of them.  I had this blank wood I got at that craft store that went out of business for about $1.50.  The vinyl was about $3.  I already had the paints on hand.

Here is what it looked like before.  
I painted the wood with Burnt Orange by Americana.  I only painted one coat.  Next, I applied the vinyl lettering.  Then, I sanded the edges and around all the words.  I didn't like the way that looked, so I added a little black paint with my dry sponge brush.  I just smeared the paint lightly on the wood.  

I like the distressed look, don't you?  


This only took me about an hour to make total, including drying time.  Super quick and EASY!  
You can't see in this picture, but there is a little hook on the bottom in the center of the wood.  

I am racking my brain trying to think of what I could hang there.
My 9 year old said she would make a paper bat, or a pumpkin I could hang on it.  
I like that idea.  What would you hang there?

I am linking with these parties

Monday, August 22, 2011

Fall Leaf Card Tutorial Revisited


Here is a card I made a few years ago and posted when my blog was a wee babe.  I hope you like it.  It gets me excited for Fall!  
Here are the supplies you need:


Patterned paper in Fall colors
2 pieces of cardstock in Fall colors
1 piece of ribbon approx. 4 inches (I used brown)
metal embellishment to thread ribbon through. You can also use a pop top from a can of pop!
Diamond Glaze

To make the leaf, you can stamp a leaf on the back side of some patterned paper (some kind of fall color) and cut it out, or if you have a large leaf paper punch, you could punch a leaf out and use that. I used a leaf pattern out of a magazine, enlarged it, then traced it on some cute patterned paper, then cut it out.

When you have your leaf cut out, then I use Judikins Diamond Glaze which is water-based dimensional adhesive. You can buy this at your local craft store for about 4.99.

Squirt out enough diamond glaze to cover the whole leaf with a thin layer. I also sprinkled gold glitter around the edges of the leaf. Put the leaf in the freezer for about 5 minutes. Take the leaf out and bend it different ways so the glaze cracks. If it doesn't crack, put it back in the freezer for a few more minutes.

You could put another layer of diamond glaze, then put it in the freezer again for a more "crackled" look.

For a 4 x 5 1/2 card, I used 1 piece 4 x 3 inches fall patterned paper, then 2 other smaller pieces of cardstock 1 was 2 1/2 x 3 (approx.) and 2 1/2 x 1 1/4. I like to use Bazzill cardstock and I choose Fall colors.

Adhere the 3 pieces of paper to the card, then, thread the ribbon through the embellishment or pop top. Glue ribbon on card.

I stamped "thanks" then cut it out and adhered it next to the ribbon. You could also print out a sentiment, then cut it out and adhere to the card.

If you have chalk ink or a brown stamp pad, rub the pad around the edges of the card. It gives it a vintage look.

That's it! I hope you enjoyed this tutorial. I sure did. If you have any questions about how to make the card, please feel free to leave a comment, or e-mail me!
kweight@byu.net

Linking to these parties:

Friday, August 19, 2011

Camping Mt. Hood Oregon


Here's where I am this weekend!  I am on this mountain.  Mt. Hood Oregon!  Isn't it perdy?  
We are camping and having tons of fun.  


We are lovin' the great outdoors!  We are doing this:


and I THINK I am going to try this:


I am hoping to do some of this:


Take care and I'll be back here on Monday!


Thursday, August 18, 2011

Crock Pot Chicken Taco Chili


This is what we had for dinner tonight!  It was soooo yummy, and it was actually healthy.  I guess this is a Weight Watcher Recipe.  It was very filling and TASTY!
This is a keeper!  Find the recipe at SkinnyTaste.

Wednesday, August 17, 2011

Live, Laugh, Love Wood Plaque redo

Remember I told you I went to a few garage sales last weekend?  Well, I got me some good stuff!  Here is the first of my projects from what I got:
Before

I liked the wood and the structure of the sign.  I didn't like the corny words on it.  I knew I could make something cute from it.  

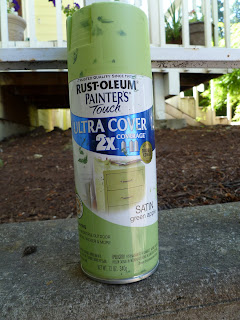
First, I took it outside and sprayed that baby with Rustoleum Apple Green.  I am lovin' this color!!
I gave it 2 coats to make sure it was covered well.  Can you tell I've used it a few times?

I love how well this spray paint covers.  You really only need 1 coat.  But in this case, I did 2.

After
I didn't take pictures of this, but I sanded the edges of the board.  Then I added a black polka dot bow, with two polka dot rosettes.  If you need a tutorial of how to do the rosettes, you can find one here.


I love how it turned out and now I just need to figure out where to put it.  

Do you think this would make a nice Wedding gift?  I am thinking about giving it to a couple who is getting married in a few weeks.

Linking to these parties:
Craftomaniac
Sumo Sweet Stuff

Monday, August 15, 2011

Framed Family Vinyl over Houndstooth print

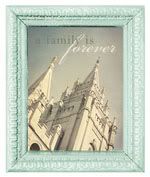
"Family- The greatest things in life aren't things"


Wow! This project only took me about 5minutes, except the vinyl took me FOREVER to apply, because it  is old.  I have let it sit around my house for a couple of years!

One of my goals this week is to use up all the vinyl lettering I have laying around.  I bought a bunch from a friend and I have never used it.  Hopefully I will be posting a lot of cool projects this week:)

All I did was cut down a sheet of 12x12 Houndstooth scrapbook paper to 8x10.  Then I applied the vinyl, which I said before, took me about 15 minutes to apply.  The key is to use tweezers!  

Lastly, I hot glued the 3 silk flowers!  So simple:)  What do ya think?  I am lovin' it!!

Coming up:  My awesome Garage Sale finds!

I am linking with these parties!
Craftomaniac
All Thingz Related
Me Making Do
Blue Cricket Design

Sunday, August 14, 2011

Good bye Junky Old Trailer!

This is going to be a quick post.  Summer is so busy!  You all know that, huh?  My 2 oldest kids were gone all week HERE, and they had a fabulous time.  Their spirits were uplifted and they met lots of new friends. I am so glad they got to have this wonderful experience!

This week has been a tough week for me.  I haven't been that motivated to make much.  This weekend I did go to some garage sales and found lots of good stuff!  I can't wait to show you what I do with it:)

Something sad happened yesterday....we sold our junky old Tent Trailer.  I was torn about it.  My kids LOVE to go camping.  I...well...don't like it so much.  The Tent Trailer was nice to be off the ground, but I needed more...like a potty....and a shower would have been nice.  I always want more.  I just wasn't satisfied.  So the hubs put a sale sign on it yesterday and it was gone within a few hours!  

I will miss that trailer.  Especially since I saw this:
Oh, I could have transformed that ugly old thing.  This is so adorable!  
Oh, well.  Now we can stay in a Hotel (which is where I really want to be).  
Good bye Tent Trailer.  We had some great memories with that thing.  I will miss it....sort of.

Thursday, August 11, 2011

Ruffly Rhumba Skirt

I stumbled across this blog Made by Marzipan today and look what I found:

Isn't that just the cutest thing ever?  I want one for me!  
Love the fabrics she used!  My 9 yr. old would love this....

Wednesday, August 10, 2011

Homemade Wheat Bread recipe- Easy!


I am going to be honest with you.  I am not a fabulous homemaker, I have only been making this bread for about 2 years now, but I am hooked (along with my family) and my kids actually like this bread better than store bought now.  It is delicious!

I always thought making bread from scratch was so time consuming and that it took some kind of magic to get the bread to rise, but trust me, this bread is yummy and it works for me every time! 

 The friend that gave me this recipe uses a Bosch Mixer with a dough hook, but I don't have one, so I make it by hand and it's not bad AT ALL!

Let me share the recipe with you:

Yummy Wheat Bread 

In the mixer combine and mix on speed 2 until well blended:
1 C hot tap water and 2 TBSP of yeast to soak for 5-10 minutes then add to:
5 cups Hot tap water
2/3 C. oil (I use canola)
2/3  Honey or Molasses  (I have used both and they are both fantastic!)
4-6 C. Freshly Milled Whole Wheat Flour

Switch to speed 1:
Add 2 TBSP salt (always add salt, it helps with the rising)
Add slowly 6-10 cups Whole Wheat flour while kneading (I usually use half wheat and half white flour)
Sprinkle in the last of the flour 1/4 cup at a time.  When enough flour has been added, the dough pulls away cleanly from sides of bowl.

Knead:  on speed 1 another 5 minutes
Shape:  Into loaf pans and let rise until the dough doubles in size. (usually I fill 5 bread pans and let it rise for about 60 minutes covered with a dish towel)

Bake: 350 for 30-40 minutes (mine take 30 minutes)
Beautiful!

Again, you DON'T need a Bosch Mixer to make this.  I do it by hand!  You can do it!!  
If you have any questions, don't hesitate to e-mail me:  kweight@byu.net.

Monday, August 8, 2011

Summer Blocks-Tutorial


I admit it, I am a little late getting this done, but I have been wanting to make these for several months now.  I am a procrastinator.  I have been since day one.  At least I still have a month or so to enjoy these, right?

You have probably seen several tutorials on this, but here is my take on it:


First, I cut the blocks to match the size of the vinyl lettering.  I bought the vinyl lettering at that store I have been telling you about that has since gone out of business.  I bought the vinyl for about 3 bucks!  
I cut the wood with my band saw.  That is the best saw to cut straight lines.  I love it.  It is really easy to use too.

Now, I brushed each block with Mod Podge.  I try not to get an over abundance of Mod Podge on the wood, so I don't have to wipe it off later.

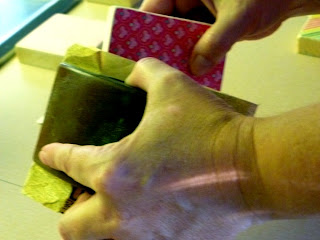
I used my daughters little blue book with all her friends phone numbers in it to flatten out the paper, or you will get lots of bubbles under it.  Keep doing this until it looks like it's dry.

{bad picture, sorry!}
Next, I took my block sander and sanded the excess paper off each edge.  Do not do this until the Mod Podge is completely dry, or the paper will slide everywhere and it will look terrible!

This step you have to be careful about.  I stained my blocks after I put the paper and vinyl on.  I tried staining the whole thing, including the paper, but it looked terrible.  I had to start over.  I only stained the sides and back of each block.  The stain I used is called Minwax Early American. It's my fav!

There ya go!  I didn't include how to adhere the vinyl.  Directions are usually included with the packaging.  It's super easy.  

I am happy with the way they turned out and they look great on my mantel.  If only for another 3 or 4 weeks:)

Linking here:
Craftomaniac
C.R.A.F.T.
Skip to My Lou
Sumo's Sweet Stuff
The Girl Creative
Someday Crafts

Saturday, August 6, 2011

New Obsession: Yellow and Grey

Have you noticed how much Yellow and Grey you have seen around lately?  I am lovin' everything Yellow and Grey.  I can't get enough of it.  I want to redo my whole house in Yellow and Grey!
Recently I have been looking on Pinterest and here are some of my favorite Yellow and Grey finds:
Isn't this the cutest nursery in the whole wide world?  If I had another baby (which I am NOT), I would decorate the room like this!

Who would have thought to paint their walls Grey?  I love how it looks with this bedding and especially the headboard!!

Such a sweet card!  Love the cute little butterflies...

I want...I want...really bad!  Love this Joel Dewberry Fabric.

I love this song!  My mom used to always sing this to my at night:)  It gives me warm fuzzies....

This felt flower is so pretty!  Just love the color combination.

I love all the cute digital scrapbook paper out there!  This would make some awesome layouts.

These are just a few of my favorites.  What do you think of Yellow and Grey?  Which one is your favorite?
Related Posts Plugin for WordPress, Blogger...