
I am so excited to have my very first guest post! There are so many uber talented ladies out there, and 1 of my favorites is Beverly from her blog Flamingo toes:
Hello Everyone!! I'm so thrilled to be here at Pocket Full of Pink!
My name is Beverly and I blog over at Flamingo Toes.
It was so sweet of Karen to ask me to come over and hang out. :)
If you haven't been by to check things out at Flamingo Toes before, here's a little sampling of what you can find there.
If you haven't been by to check things out at Flamingo Toes before, here's a little sampling of what you can find there.
I love making aprons. Especially aprons with Ric Rac.
I also love doing knockoffs - especially from Anthropologie.
A little while ago I had Anthro Necklace Week - 5 days of necklace tutorials.
It was so much fun! Here's a peek at a few of them.
It was so much fun! Here's a peek at a few of them.

Since that was such a big hit, I thought it would be fun to do another Anthro Necklace Knockoff.
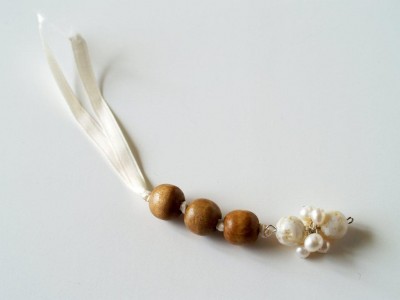
This time we're doing a revised version of their "Into the Woods" necklace.
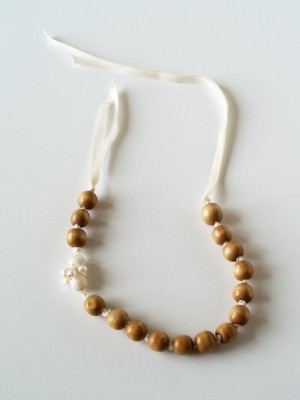
Here is my version.
Here is my version.

And here's the Anthro Original . . .
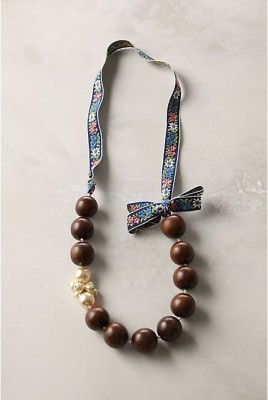
Same basic idea - but I wanted mine to be a bit more neutral so I can wear it with more things.
Though I do love that retro ribbon. If I find any of that I'll probably have to make another one.
Though I do love that retro ribbon. If I find any of that I'll probably have to make another one.
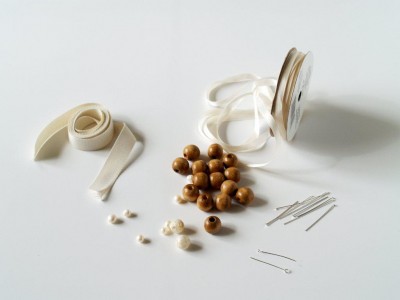
Ready to make your own?
Here's what you'll need.
Here's what you'll need.
• Twill tape or decorative ribbon (about 1 yd)
• 2 yards of narrow cream ribbon (needs to fit through your beads)
• wooden beads (16)
• Accent Beads (2 large & 6 or 7 small)
• Headpins and eyepins
• Needle and thread
Round nose pliers and wire cutters
• 2 yards of narrow cream ribbon (needs to fit through your beads)
• wooden beads (16)
• Accent Beads (2 large & 6 or 7 small)
• Headpins and eyepins
• Needle and thread
Round nose pliers and wire cutters
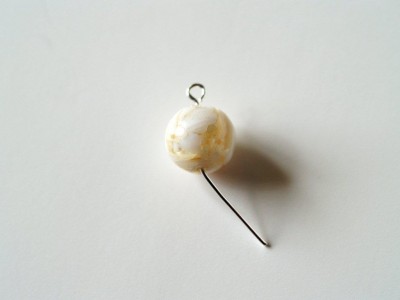
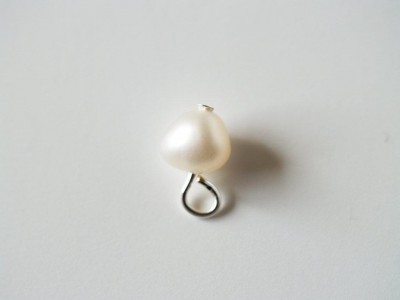
Start with getting your accent beads ready. We're going to put them on eye pins, which are wires that have a loop in one end.
Thread the pin onto the bead and bend the wire at the other end of the bead.
Thread the pin onto the bead and bend the wire at the other end of the bead.
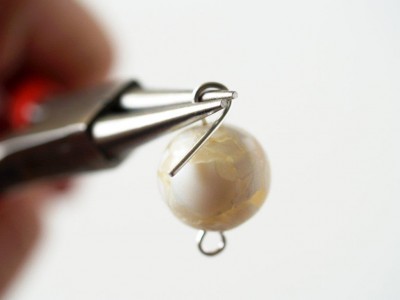
Hold your wire with the round nosed pliers, snug against the bead. Wrap the wire around one side of the pliers so that it makes a loop.
With your wire cutters, trim off the excess wire. Make sure you face the wire cutters away from you.
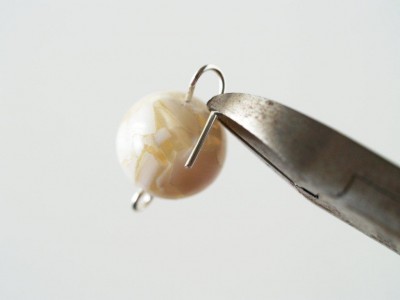
After you've clipped the wire, with the round nose pliers finish making the loop. Repeat with the other accent bead.
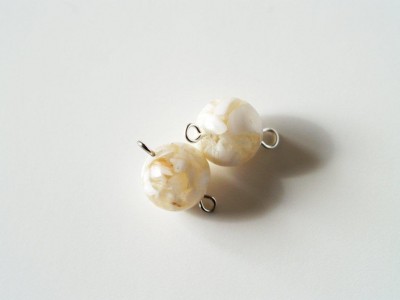
Follow this same process only with head pins for your small beads. Put the wire through the bead and make a small loop in one end.
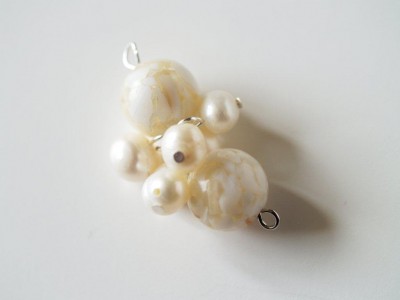
Open up one of the loops at the end of a large accent bead and join it to the other large accent bead.
Open up the loops of the small beads and add them to the loops between the two large beads.
You want the area between the beads to look pretty full.
Open up the loops of the small beads and add them to the loops between the two large beads.
You want the area between the beads to look pretty full.
Cut an 18" piece of your narrow ribbon and knot it around one loop of a large accent bead.
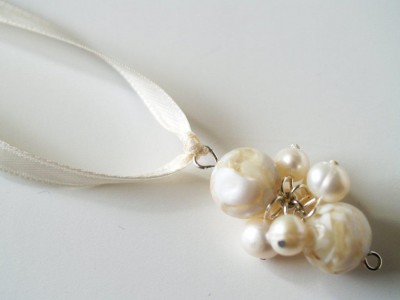
It might help to thread your ribbon through a large needle.
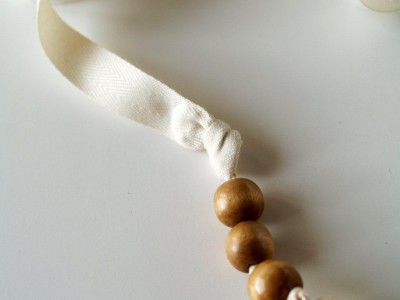
Pull the ribbon through a large wooden bead and knot the ribbon after the bead to hold it in place.
Add two more beads the same way, knotting after each bead.
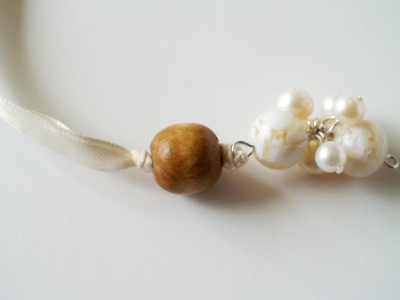
Cut a 54" piece of ribbon and knot it to the loop on the other side of the bead cluster.
Add wooden beads until the bottom section measures your desired length. I used 16 beads and I knew that I wanted it to be a bit uneven.
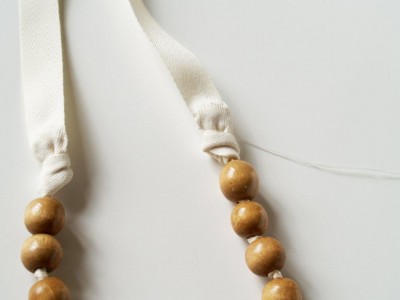
Knot one end of the twill tape around the left side of the bead strand, catching the narrow ribbons in the knot.
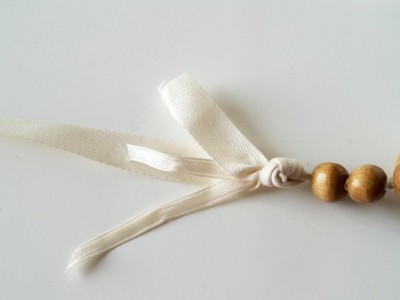
Trim the narrow ribbons and the twill. Turn the short twill end under and with the narrow ribbons inside, stitch the twill down.
Use tiny stitches so they don't show from the front.
Use tiny stitches so they don't show from the front.
Cut a small piece of twill for the bow. Overlap the ends and sew down the middle so there is a small gather.

Cut another small piece for the center of the bow and wrap that around tightly and sew.
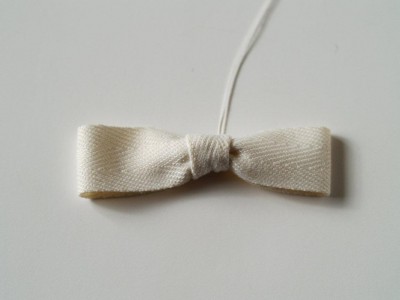
Sew the bow to the right side of the necklace above the knot.

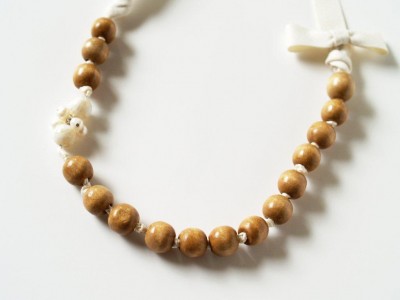
You're all done!
I love the contrast of the pearls and the wood.
I love the contrast of the pearls and the wood.

And the obligatory picture of me wearing the necklace.

(To understand my weird facial expression you need to know that our neighbor's mangy cat was giving me the stinky-eye from our fence. I wasn't going to turn my back on him.)
At least the necklace is cute. haha.
At least the necklace is cute. haha.
I hope you enjoyed the tutorial!
I'd love it if you stopped by Flamingo Toes sometime and said "hi". :)
Thank you so much Karen for inviting me over!


Stunning! I love the pearl accents. How is it you make wire work look so easy??? I'm jealous!
ReplyDeleteThis is so Cute, I really love the pearls along with the wood beads....Amazing..
ReplyDeleteBrenda
LOVE it!!!! I can't get enough of knock offs!
ReplyDeleteIt looks real cute
ReplyDeleteThat is an awesome necklace! I totally want one, and you should definitely keep an eye on that cat.
ReplyDeleteI love the colors you used! Thank you for the tutorial.
ReplyDeleteI love it, even better than the anthro one. And I'm so happy posted a tute because I just recently decided to try and make jewelry and this was really helpful! Thank you so much for sharing your talent!
ReplyDeleteAmie @ http://www.kittycatsandairplanes.blogspot.com/
Karen,
ReplyDeleteThanks again for having me over!! It was so fun guest posting at Pocket Full of Pink!!! :)
Very Cool, at first I thought the pearls were popcorn. (Halloween). Love it. Thanks for the tutorial
ReplyDelete