Sunday, December 23, 2012

Christmas Blessings

I know it has been over a month since my last post.  Here it is 2 days before Christmas!  It's amazing how time flies once September comes.  

Are you all ready for Christmas?  I have all my shopping done, but still need to wrap the presents.  I love the magical feeling of this season!  

As you can probably tell, I am not the most organized person and on January 7th I start school again taking 13 credits.  I probably won't be around here much, but I will still be looking at all your blogs, so keep creating!!

I feel so blessed this time of year and I hope that as you celebrate this season, you look back at 2012 and realize what God has blessed you with.  

I am working on this too.  Sometimes when you are so immersed in your own problems, it's easy to forget the blessings that you have!  

I am REALLY trying to do this EVERY day!  

Happy Holidays!!

Sunday, November 18, 2012

Hawaii and what's to come for my Blog!

Hi Friends!

I am finally getting to a post about my Hawaii trip.  Things have been a little crazy around here since I have come back.  Hubby and I have had such a great time!  Hawaii is such a beautiful place.

I loved it!!

I love this gorgeous picture of the lake we took a boat on to get to the Fern Grotto!

Waimea Canyon

This view is from an airplane ride that we took around the Island of Kauai.  So beautiful!!


I loved this view from outside our Hotel room in Kauai.  the ocean is so amazing:)

Well, there are just a few (I took like a jillion!) pictures of our trip to Hawaii.  It was so fun and relaxing!

My college student daughter is coming home for T-Giving tomorrow!!  Can't wait to see her.  Time just flies by doesn't it?  

I may not be on here a lot during the holidays and then I start back in school in January.  I don't want to completely give up blogging, but I feel like there are so many more important things I should be doing right now in my life.  

For now I won't be around much, but know that I am still crafting and online, so keep in touch!!


Tuesday, November 13, 2012

Fall Burlap Wreath

I am excited to have Meredith from Wait 'Til Your Father Gets Home blog here today!  Take it away Meredith: 


Hi everyone, I hope you all had an awesome week! I'm Meredith and I blog at Wait 'Til Your Father Gets Home!
I started blogging this past March, so I'd say that makes me fairly new to the wonderful world of blogging! I like to share simple crafts, home decor ideas, recipes, and other easy DIY projects.

I've officially jumped on the burlap train for most of my fall decor this year. I just could not resist after seeing so many wonderful projects floating around the blogosphere. It was Sarah's Fall wreath and Allison's Fall Ruffled Burlap Berry wreath in particular that have inspired my version.
Here's what I rounded up at Michael's to create my...

Ruffled Burlap Wreath

floral pins (the u-shaped kind)
burlap garland
berry garland
felt pumpkins & leaves
styrofoam wreath form (18")
I'm just going to be up front and admit that I had a 12" wreath form in my craft closet. All of these pictures show that size until I realized that it was going to be way too small for my front door. So I ran back out the next day to actually buy one that would work. Luckily I was able to use a coupon and found an 18" flat form at Hobby Lobby.
The first thing you'll want to do is wrap your wreath form with burlap as tightly as you can. I used a floral pin at the beginning and at the end once it was all wrapped.
Now that the wreath form is wrapped you don't have to worry about seeing bright white poking through if you have a gap in your ruffles.
Just start ruffling, bubbling, and pinning around the front side of the wreath.
I was intimidated to start the ruffling step, but once I began it was super easy.
Once you've got the burlap ruffled all the way around the front side, you're ready to begin the fun part--adding the berry garland and the little felt pumpkins and leaves! To add the felt pumpkins, I simply put a dab of hot glue on the backside and attached a floral pin to each of them.
Alright, so I mentioned before that once I finished the first wreath and hung it on the door, I quickly realized that it was sadly too small.
So, I sucked it up and realized I'd have to take apart the small version and grab a bigger wreath form next time I was out and about.
Luckily since I used the floral pins I could just take everything off and reattach it to the larger wreath. It was so easy!
And I can definitely say that I think the larger wreath looks much better.
It screams Fall if you ask me!
Burlap
Pumpkins
Leaves
Berries
{oh my!}
What holiday projects have inspired you this season?
What's your favorite fall decor item of choice this season?
Have an awesome weekend everyone!
Thanks again to Karen for having me over to her place today!

Tuesday, November 6, 2012

Halloween Costume Ideas {for next year!}

Hi Pocket of Pink readers! We’re very excited to be guest posting today (and more than a little jealous about that Hawaii trip…)! We are Nat and Ash, and we are 2 cousins who love to craft, sew, decorate, and we have 7 kids between us (5 boys for Nat, 2 girls for Ash). So our blog is a hodgepodge of everything we’re interested in, and a way for us to keep track of our successes and failures! We’d love for you to come over and say hi! Here’s a list of our tutorials if you want to see our projects over the last year. Seeing as how it’s so close to Halloween, I thought I’d share some of our favorite costume helps from this past month. It’s been lots of fun, and tomorrow, tune in on our blog for our family’s costume reveal!

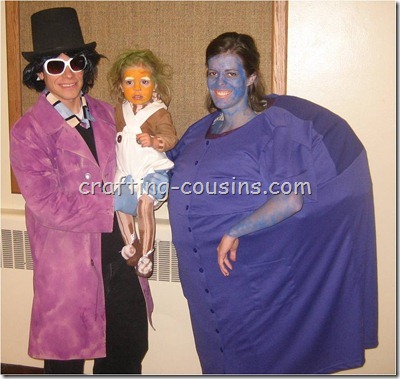
I shared a bunch of our family costumes from year’s past here

And Nat shared some here

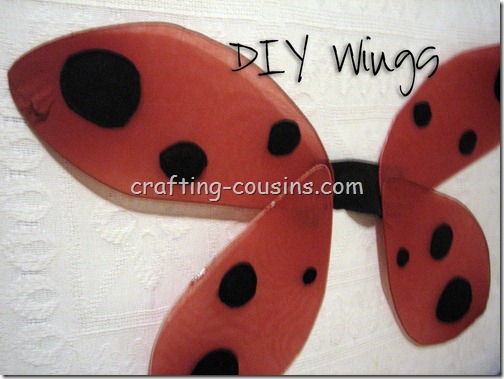
I shared some wings I made here

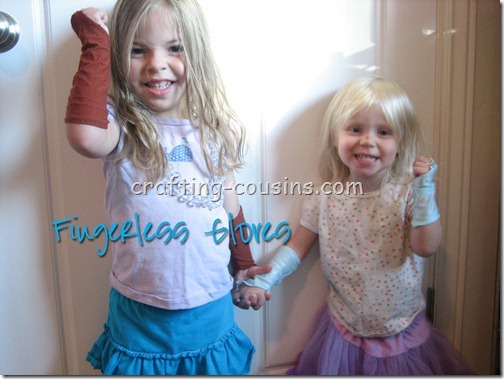
My girls showed off their gloves here

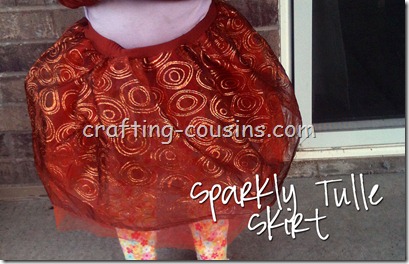
And here are 2 skirts I made for them for Halloween this year

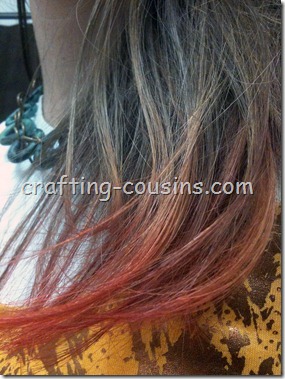
I dip dyed my hair with strawberry Kool-Aid here to show you my results…You know, in case you want your hair to be a different color for Halloween Smile

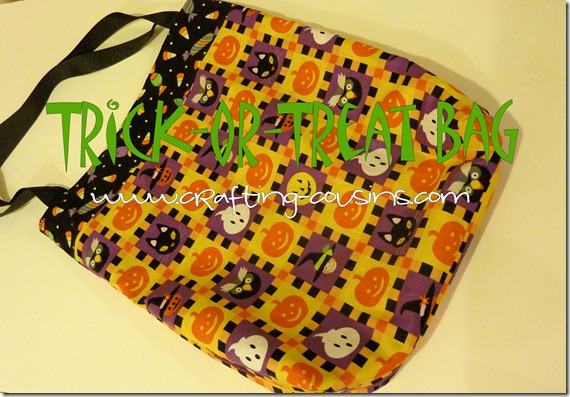
And Nat finishes off the costumes some customizable trick or treat bags!

Monday, November 5, 2012

Katie from Creatively Living

Hi Pocket Full of Pink Readers!
I'm Katie, and I blog over at Creatively Living.
I'm excited to be guest posting for you today.
I love a good craft or sewing project, but what I really enjoy is renovating houses.
Here is my latest "space" reveal.
Awhile back, I blogged about the small office space in our basement that I made for my husband (who never uses it).
These were the before pics...
The way it was when we moved in (arrow is pointing to the area I'm focusing on).
It's almost difficult to see in the picture above, but the little indented space was turned into an office nook for my husband. My dad and I worked on it one summer while he was gone.
I added the black shelf and my dad helped me take a counter that was scratched from Lowes (best way to get a counter discount... find the scratched one and ask for a price reduction) and we cut it to fit the space, then secured it.
Most of the junk here is mine (yes, I'll admit it), the weird hatchet and cross-rifles belong to my husband, who was an Army infantryman for 10 yrs.
For a couple years, this has been one of those "out of control" spaces. A mixture of my husband's school work (he's just about to finish his Masters in Divinity), books, and random DIY stuff.
This pic below is highlighting the missing ceiling, the unfinished trim work and the places where I had to replace tongue and groove paneling.
These are the projects I've showed you thus far, in my attempt to create a "sale-worthy" office space (since we currently have our house on the market).
....and here's the after.
Put in flooring, paint and 1/2 the trim/baseboards a couple yrs ago, along with putting in the desk and shelf.
More recently, I hid the crazy bookshelves with the Desk Skirt.
Kept the lamp and added some other simple decor I had on hand.
Books and rocks were easy, available and inexpensive.
Notice I patched over that cut in the paneling with a DIY coat rack....just some putty, boards, and hooks.
I also framed one of my husband's maps from his Iraq tour. I was happy with how well it matched everything.
I've actually been using this space quite a bit lately.
Strangely my husband still doesn't.
Maybe we should just switch office spaces!
Here are some other before and afters you might enjoy...
A bedroom makeover I did for my sister for under $70.
Thanks Karen and Pocket Full of Pink Readers for having me here.
Come visit me sometime at Creatively Living!

Infinity Scarf

Hi Pocket Full of Pink readers! I'm Priscilla and I blog over at Thrifty Crafty Girl.  Karen was nice enough to let me guest post at her place today, so I'm showing you a fun little fall project I made... I hope you like it!

I love this thing.

So, I saw all these people wearing these 'infinity scarves' and I just loved them.  And I thought it would be the perfect project for November, since it's getting frosty outside.  So I went to the fabric store and found some fun flannel.  Yes, flannel can be fun, if you have no other excitement in your life that is.


See? Fun!

I got two yards for this scarf, which is plenty.  I cut the flannel into a strip 18" wide by two yards long.  Once that was done, I pinned up the long end, right sides together.


Next, I sewed up the long end.  I love sewing straight lines. Use whatever seam allowance you like because you're awesome and know what you're doing.


Once that was done, I turned it right side out.  Now most people would stitch up part of the ends before flipping but I hate having to pull fabric through tiny holes.  Since this is an infinity scarf, having a seam would not be such a big deal.  I pulled it right-side-out and sewed the ends together.  This whole thing took about 30 minutes.


I made a scarf! And it's infinity! Infinity times infinity, even!  Oh, that fall were all year round so I could make a hundred of these. :)
Thrifty Crafty Girl

Sunday, November 4, 2012

Distressed Pumpkins

Hi there Pocket Full of Pink readers! I am so excited to be here today, guest posting for Karen! My name is Katie, and I blog over at Katie{Did}It. I love pumpkins and I love distressed things. So when I saw this over at Centsational Girl, it was a must make for me. So easy and quick, like most of the projects I do here.


Don't you just love those old antique scales? Well, I looove them, and I was finally able to get my hands on one. And it goes perfectly. So I painted myself a little pumpkin with some homemade chalk paint, and then went to town distressing it.


Just use a foam brush to paint it, then once it's dry, take some sand paper and start rubbing away areas of paint. And that's it! This may be one of the easiest and quickest projects yet! I plan on making a few more, but will probably wait until closer to Thanksgiving to do them.

What do you think? Have you ever painted pumpkins before? Have you ever worked with chalk paint before?

I hope to see you over at Katie{Did}It sometime! Thanks again for having me Karen!

Saturday, November 3, 2012

Fall Ruffle Wreath

Hi Pocket Full of Pink readers!!  My name is Jenny and I blog at Days of Chalk and Chocolate!  It's my little slice of the blog world where I chronicle my days as a mother, crafter, DIYer, and sometimes teacher. I hope you'll come visit one day! I'm so excited to be a guest poster while Karen is off having fun.  Thank you, Karen for the opportunity!  I thought I would share my most popular post and one of my earliest in my blogging life:  my fall ruffle wreath!  I call it fall because I used cordoroy but really it can be any season!


Without further ado...

Ok, so  I promised this tutorial yesterday but it just didn't happen. Jim works from home 3 days a week and we only have one computer hooked up in the apartment which means from sun up to sun down I can't get on. And then my sister and I spent a ridiculous amount of time in Joanne's looking at fabric so I couldn't post in the evening. She is a knitter and she is working on a knitting exchange with some friends from Ravelry so she's always fun to hang out in Joanne's with. Plus she's the kind of friend that, instead of saying "No, you don't need that. Save your money. I know it's beautiful but you just don't need it," she says "Do it. I'll do it. If you do it I'll do it. You know you want to."  Love that about her!  

Anyway, I'm still learning how to put together a really good tutorial but I did my best and I hope it helps! 

Step 1:  Gather your materials.  You will need a wreath form (mine was 16 inches), 2 yards of fabric (I'm guessing because I had remnant fabric), glue gun, basic sewing tools, ribbons/fabric to make flowers. I made my flowers first. Here is a mini-tutorial on the twisted fabric roses.


  • Heat up your glue gun. Pre-cut a cut felt circles the size you want your flower to be (approximately). Cut strips of the fabric. I like my strips to be about an inch wide.  Fold in half long ways and fold down one corner and hold it with your thumb like this.   (This picture is from a different project that, um, didn't work out. That's why it's black.)


  • Twist the strip and and wrap around the starting "knot."  Continue twisting and wrapping, holding it all along with your thumb to keep the shape. Play with the tightness of the twist to achieve the look you want. I like to use a loose twist.


  • Continue wrapping, twisting until you get to the end.  Use a dot of hot glue to secure the end to the bottom of the flower. Stick finger you got hot glue all over into a glass of ice water.


I have found that thicker, stiffer fabrics work the best. I tried organza and it was a glue gun catastrophe. I'm still reeling from it.

Ok back to the wreath. 
Step 2: Pre-make 22 ruffles. I used two different types of fabric: cotton and corduroy in the same color so 11 of each . I have a tutorial on making the ruffles here. I used lengths of fabric that were 18 inches to make my ruffles which was 2 1/2 times the width of my wreath form. You will have to measure your wreath form. Also I prefer looser ruffles. If you like tighter you will need to use longer lengths of fabric.


Step 3: Cut strips of fabric to wind around wreath as a base. Cover the enter wreath. I cut this step out because I had remnant fabric and didn't have enough to do that. DON'T SKIP IT! It isn't the same. sniff. 


Step 4: Begin gluing your ruffles. Lay the first ruffle face down on the table. Run a bead of hot glue on the ruffle. Lay your wreath form on top. Bring two sides of ruffle up and glue in place.


Step 5: Keep gluing in the same way, alternating fabrics, all the way around the wreath. This is clearly a one sided wreath, lol. It is not essential that you do your gluing on a Sesame Street place mat, by the way.


Step 6: When you have completely covered the wreath in ruffles, lay your flowers in the arrangement you want. Then glue your flowers to the ruffles.


All finished!


I hope you enjoyed my little throwback and thanks again to Karen for inviting me to join in the guest posting fun!  
Cheers!
Jenny


Related Posts Plugin for WordPress, Blogger...