Showing posts with label frames. Show all posts

Wednesday, February 9, 2011

Love Rosette Frame and Bumper Sticker Winners!!

Thanks so much to those of you who responded to the Bumper sticker giveaway.  I know it's not much, but they will sure look great on your Bumpers!  I will e-mail the first 10 people who responded and told me why they LOVE blogging to get your info. 

Now....onto my latest craft project!

I had a 5 x 7 frame laying around and I wanted to use it. I went to Target and bought card from the dollar section. 

The card fit perfectly!  I had bought a cute mini wreath at Joann's a few weeks ago ($2.99), but didn't know what I was going to use it for.  Well, I figured it out!  I hung it from a cute Robin's egg colored polka dot ribbon (that came on some wash cloths I bought recently).

 Lastly I had to add some adorable rosette's on the bottom right hand corner of the frame.  I made two small ones from the left over ribbon which I hung the mini wreath with, and used some left over fabric I had from a project a few months ago.  Sweet:)  Total cost: $4.  The price was right and I loved how it turned out!  
Super cute, huh?  I just love the Robin's egg ribbon.  Sooooo pretty and repurposed!  I love to reuse stuff:)  It's kinda Valentiney, but I think I could leave it up all year, don't ya think?

Wednesday, February 2, 2011

Vintage Valentine's Frame


 I was soooo excited when I found this cute little frame at Salvation Army for $.50.  It was perfect for this project. 

First I had to spray it Red!  I am not usually fond of glossy spray paint, but I think it turned out just fine.  I bought some cute glitter paper at Michaels, cut it to size, then glued a tiny vintage Valentine picture in the center.  I also added a few tiny pearls that were sticky on the back.  It needed some more love, so I added a black bow on the top.


I love how it turned out!  Simple and cost me about $1.50.  Hows that for an inexpensive Valentine decoration.  I set it on a pretty little white doily heart in my living room.

I can't wait to show you what I made the other day!!  I am also having a giveaway this week:)

I am linking up here:
Somewhat Simple Strut Your Stuff 

Monday, January 17, 2011

I Love You Picture Frame Tutorial

I was at the Craft store the other day (it's called Craft Warehouse).  I was really excited when I found these cute MDF frames for 1.50 each!  I bought 4 and wasn't really sure what I would do with them, but when I got home, my creative juices started to flow (love it when that happens!).

I call it a picture frame, but I didn't really use it as one.  Here are the supplies you need:

-frame
-mod podge
-craft knife
-brayer
-sand paper
-brown chalk ink pad
-pencil
-paint brush
-cute scrapbook paper (I used 1-12 x 12 piece, Bittersweet from Basic Grey)
-embellishments to decorate outside of frame
First, trace the shape of your frame on the paper.
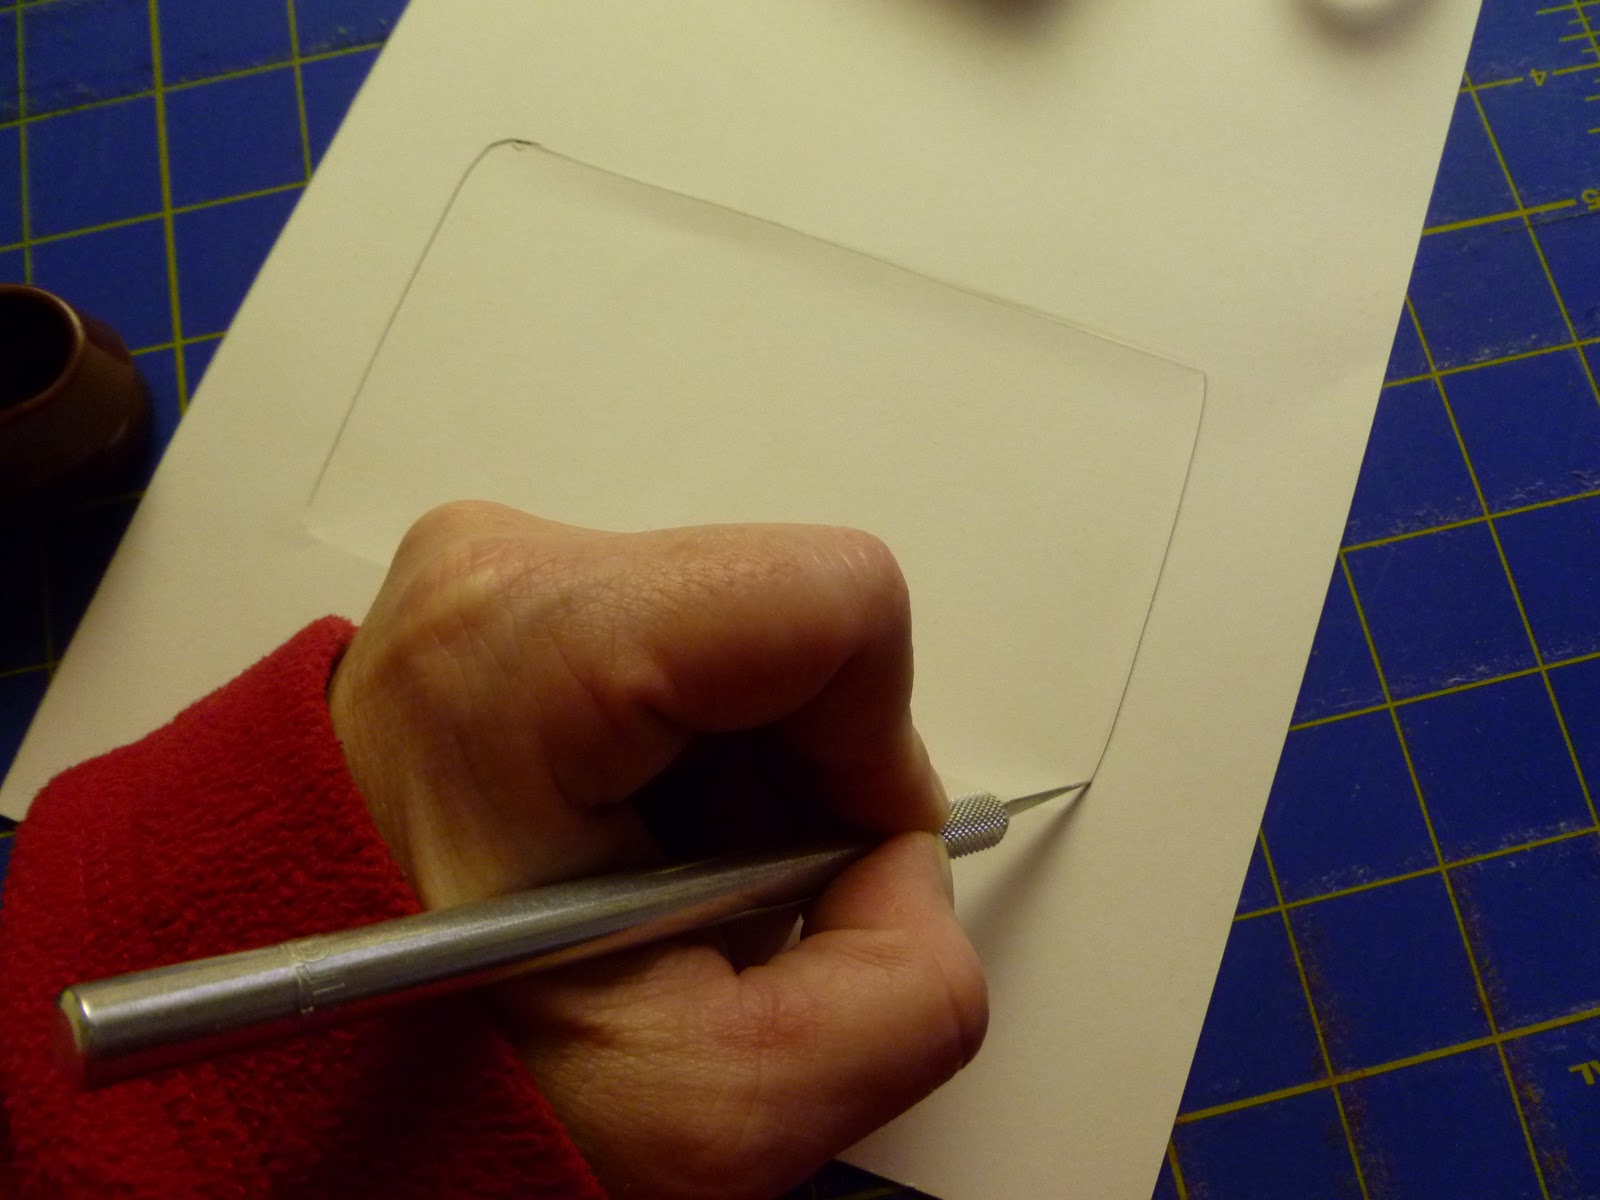
This step looks kinda weird, but I am pressing my hand around the shape of the cut out in the frame on my paper, so I can cut it out with a craft knife.
Next I cut out the opening in the paper with my craft knife.  It actually worked pretty well the way I did it.  I wasn't sure how just pressing around it would work, but yay it did!  Sorry, I get excited about little successes.
Here is what it looks like cut out. 
Now is the fun part!  Coat that baby with lots of mod podge.  I just kinda slapped it on there with my brush.  Oh...look, I even left the price tag on!
This is a really important step.  This brayer is AWESOME!  It is the only way I have found to get all the air bubbles out from under the paper.  I just rolled it over the whole frame several times and no air bubbles!  Brayers are pretty cheap, especially with a coupon at JoAnns or Michaels.  Totally worth it if you use Mod Podge very much!
I have to apologize, because here is where I stopped taking pictures!  I got distracted doing the project, sorry! 

When the mod podge dried, I sanded around all the edges with sandpaper.  You may find that some of the paper hangs over the edges.  No biggie, just take your craft knife and cut it off, then resume sanding. 

After I sanded, then I took my cute little cats eye chalk ink pad.  The color I used was chestnut brown.  I love this little guy! I went around all the edges, including the opening in the center of the wood for the picture.  It's a little tricky, but you can just wipe off any ink you get on the window.  

For the striped paper in the center, I just traced the paper that was already inside the window on my cute scrapbook paper and replaced it with my paper.  Then I pushed it inside the frame opening and inserted the plastic frame cover that came with the frame.  
The hearts I used came from the Target dollar bins last year.  I just attached them on the outside of the plastic frame opening.  They are 2 dimensional, so were too bulky to stick on the inside.

The I and You were also chipboard letters from the Target dollar bins last year.  They matched perfectly!  I love how it turned out.  Super fun and easy.  It only took me about 45 minutes total to make!  
 
Have a wonderful Monday!!

Tuesday, September 28, 2010

Beautiful and inexpensive Fall Inspiration

Have you been on the Better Homes and Gardens website recently? I haven't been on their site for years and today I stumbled across it. They have so many fun, inexpensive Fall decorating ideas!

I got carried away looking at all the fun things I could make for super cheap and they really look pretty easy to make.


I have been on a vase kick lately and these are so pretty and simple, but they look great!


I love this little barn wood box!  I am so going to be on a lookout for 1 of these.


I just love the chicken coop wire on this frame.  There are so many possibilities with frames!

I hope you are enjoying your Fall and having fun decorating.  Go visit BHG and get some cool ideas!
Related Posts Plugin for WordPress, Blogger...