Tuesday, October 4, 2011

Today's Guest: Ginger Snap Crafts

Hi!  I'm Ginger from Ginger Snap Crafts. 
I'm so excited to be here at Karen's Monster Craft Bash. Wahoo! 
I LOVE October!  Halloween, fall & it's my birthday MONTH!
{Does any one else celebrate their birthday the whole month, too??!!}  :)
This October is even more special because my little blog is celebrating a BIG milestone...
so if you get a chance check out my blog THIS week. 
{I've got some HUGE giveaways & FANTASTIC guests lined up!}
OK..now on to my MoNsTeR CrAfT!!!
This cute, little Boo Block! :)
It was super easy!  I just took a piece of 2x4 that I had left over from another project & painted it black.
Then I cut several different boo!'s out in different colored vinyl in some of my favorite fonts. 
{I used my Silhouette, but you could also use stickers, paint pens or whatever you have around.}
Applied my vinyl lettering & then tied a ribbon around my block.
That's it...cute & easy!
{Thought it looked super cute with my ghost I got in the clearance aisle at Hobby Lobby!} :)
Thanks so much for having me over, Karen.
It was fa-boo-lous!!!
Don't forget to stop by Ginger Snap Crafts! I'd LOVE to have ya!
I've got a super fun link party on Wednesdays! 

 
Would love to have YOU come link up!


Thanks so much Ginger!  I love that you used a leftover 2 x 4 from another project!  Easy:)  Ginger has so many cool tutorials on her blog.  Here is one of my favorites:

I love how she arranged the vinyl and pictures!  Looks great!  Go check out Ginger's blog and see what else she's created. 

Monday, October 3, 2011

Monster Craft Bash: {Halloween Projects revisited}

Don't forget to enter the Vintage Rose Wraps Giveaway!  It will end Oct. 8th @ Midnight.  Click here to enter.


Last Halloween my blog was still in it's infancy, so I thought I would share some of my past Halloween projects in case you didn't get to see them!  

This is one of my favorites!  I found this wood with the cute knobs on it at Salvation Army!

My take on this wreath made with Dollar Tree items.

Spooky Subway Art with a old frame found at Salvation Army and Basic Grey scrapbook paper!

Trick or Treat Wood Blocks made with 2 x 4's.  

Be sure and visit tomorrow and the rest of the week!  We have some spooktacular guest posts!!

I am linking here:
Craftomaniac
Confessions of a STAHM
Sugar Bee Crafts
Southern Lovely
Happy Hour Projects
Rustic Crafts
Be Different Act Normal

Sunday, October 2, 2011

Monster Bash Giveaway: Vintage Rose Wraps

The winner of the My Memories Suite Giveaway is Ben and Jess!  I've sent you an e-mail, please contact me within 48 hrs.  Congrats!!


Hello my fabulous followers!!  We are kicking off this Monster Craft Bash with the first Giveaway from VINTAGE ROSE WRAPS. This Giveaway is open to EVERYONE.

Here's what Vintage Rose Wraps has to say about their product:

It only takes wearing a vintage rose wrap once and you'll see why these fun and flirty numbers become a must for anyone's wardrobe. These shabby and chic wraps come in all colors of the rainbow, and add just the right flair to any outfit--to make you feel vintagy, yet fresh...hip, yet humble. The best part about them is you hardly know it's there when wearing one. The soft, cotton fabric and easy tie makes wearing them absolutely effortless. {Gone, gone, gone are the days of the hurtful headband and in, in, in are the days of the vintage rose wrap!}

Aren't they so flirty and fun?  I love this one....

Here's another of my favorites!  Love the polka dots!

Are you lovin' these beautiful wraps?  Well, Vintage Rose Wraps would like give one of my readers a $50 gift certificate to their store!  Thanks right....$50 dollars worth of these sweet headbands!

Here's the lowdown on what you can do to win:

1st entry {mandatory}- Go to Vintage Wraps Blog and follow their blog.  Leave a 
comment here and let me know you did.

2nd entry- Go to Vintage Rose Wraps on Facebook and "like" them.  Leave a comment here saying you did.

3rd entry- Go to Vintage Rose Wraps Shop, look around their store, pick out your favorite item, and come back here and leave a comment here about it.

4th entry- Follow Vintage Rose Wraps on Twitter. Leave a comment with your Twitter address.

5th and final entry- Follow my blog! {Pretty Please}Leave a comment and let me know if you are a new follower, or if you are already.

5 ways to win this awesome gift certificate!  Wahoo!!  {I wish I could win....}

This giveaway will end  October 8th at midnight.  I will announce the winner Sunday morning October 9th.  

Good Luck to you all!


Saturday, October 1, 2011

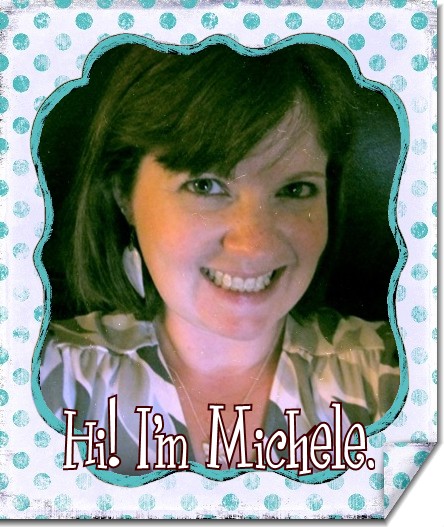
Today's Guest: Michele from The Scrap Shoppe


Hello, Pocket Full of Pink readers!
I'm very excited to be here for Karen's Monster Craft Batch!
I'm Michele, and I create over at The Scrap Shoppe.
Halloween is one of my favorite holidays to decorate for so I'm super excited to share today's project with you!
I'm going to show you how to make
SPIDER WEB DOILY BUNTING!
The first thing we'll need to do is dye our doilies black because white
 just doesn't scream spooky to me.
How about you?
Supplies for dying doilies
pie tin
black acrylic paint
toothpick
cheap doilies (mine were $1 each at Michael's)
freezer or wax paper
latex gloves (not shown)
(Note: You can dye as many doilies as you like! I used 5.)
1. Add water to your pie tin then a nice long squeeze of paint. 
2. Use your toothpick to mix the water and paint thoroughly. It will look like a big dish of black water.
3. Put on your latex gloves and dip one of the doilies in the water mixture.
4. Using your hand, push the doily around in the water mixture to get the paint into all of the crevasses.
5. If you happen to miss a spot when you start to pull your doily out of the water mixture just dip it back in again and work the water into that area.
6. Once you are satisfied that the doily has covered with the black paint, remove it from the water and very gently squeeze out the excess water. If you wring it out too hard you will lose some of the coloring!
7. Lay the doily out flat on your freezer paper to dry.
Repeat with all of the doilies.
(Note: I went through this process twice. After the dying the doilies once and allowing the them to dry in the sun, I felt they were too gray for my taste. I simply ran through the dying process again and was satisified with the coloring the second time around.)
8. Once the doilies are completely dry, use a ruler to measure across the center.
9. Cut the doily in half.
10. Repeat for all of your doilies.
11. Take some black ribbon and stretch it out so that you can line the doilies up underneath it. I stretched mine across my giant cutting mat and kept the ends taute with clothespins. You can do something similar with a table if you don't have a giant mat like mine! When you line up the doilies underneath the ribbon be sure that you lay them out upside down (the back of the doilies may not be colored as well as the front).
12. Take some fabric glue (I prefer Fabri-Tac from Beacon's) and run it along the length of your ribbon.
13. Place your doily (upside down!) on top of the line of glue. Repeat down the length of the ribbon.
Continue the gluing process until all of your doilies have been added to the ribbon.
Once your glue has dried and you flip the doilies back around you will have a nice clean look along the top of the doily bunting!
Hang your spider web doily bunting where you dare!
Mine is spookifying my mantel!
And, of course, no spider web is complete without a spider!
This fat little guy is made with a homemade black yarn pom pom and silver pipe cleaners.
Happy Halloween, y'all!
Come by and visit sometime!
Thanks so much for having me over, Karen!

Thanks for hanging out on my blog today Michele!  That bunting is super cute!  You should go check out Michele's Scrap Shoppe blog.  Check out these Mod Podged Shelves!
Go to her blog to find out how she made this and look around!  She is so crafty:)

Thursday, September 29, 2011

Easy Halloween Pennant Bunting

If you would like to enter the My Memories Suite Digital giveaway, click HERE.
It ends Saturday at midnight!


I have been wanting to make one of these for a looooong time!  I have about everything else for Halloween but a cute little bunting.  This one isn't exactly little.  Each piece is about 3 1/2 x 6 inches folded!  

This only took me about 20 minutes to make.  I cut each piece of paper with my industrial sized paper cutter.  Then I folded each piece in half, cut the bottoms of each pennant.  This paper is from My Minds Eye Boo to You and Spook line.


Next, I  found some black glittery chipboard letters for the "Halloween."  I used Mod Podge to glue them on the paper.  I only used the Mod Podge on the bottom.  It dries so fast, that's why I didn't use regular glue!


After the letters were dry, I measured a piece of ribbon, slid the ribbon inside the paper, right where it folds, then glued the ribbon with Mod Podge.  Again, it only takes it about 10-15 minutes to dry.  


There you go!  A cute, fast and cheap way to make a pennant bunting!  It also used up a bunch of my paper scraps as well!

Hope to see you SATURDAY for the kick off of the Monster CRAFT bash!  It's going on every day in October!! 

I am linking here with these parties:

Tuesday, September 27, 2011

Monster Bash Party coming in October!

Do ya like my cute little button?

I have been soooo excited to tell you about this, I could hardly contain myself!  I have been wanting to have a party on my blog with guest bloggers, giveaways, etc, for months.

 Well, my friends, I finally put one together.  I am calling it Monster Craft Bash!! You are in for a treat!  Wait until you see what I have in store for you the WHOLE month of October.  Here's a peek at who will be hanging out here sharing a fantastic tutorial with you all:

Michele- The Scrap Shoppe                                                         Bev- Flamingo Toes             
Gina- Shabby Chic Cottage                                                         Jamielyn- I heart Naptime
Ginger- Ginger Snap Crafts                                                         Lindsay- Southern Lovely
Linda- Craftoholics Anonymous                                                 Allison- A glimpse Inside
Jen- Craftomaniac                                                                        Jennifer- Scissors and Spatulas 
Nan- You Could Make That                                                        Kara- Creations by Kara
Kaysi- Keeping it Simple                                                             Michelle- Michelle Paige
Janet- Today's Fabulous Finds                                                     Fawnda- Fireflies and Jellybeans
Heather- Me Making Do                                                              Hannah- Young and Crafty
Kelsey- Tattered and Inked                                                          Kathy- Dandelions and Dust Bunnies
Haley- The Autocrat                                                                    Ginger- Literally Inspired
Candace and Nicole- Crafty Sisters                                              Kristyn- My Lil Luna

Giveaways
Vintage Rose Wraps
Dandelions and Dust Bunnies
Expressions Vinyl
Cinnamon Sticks Jewelry
Sweet Pea Totes
Domestic Charm

Can you believe all these lovely ladies agreed to post on MY blog???  I am so honored and excited!!  
I hope you will stop by to see their fabulous posts and the fantastic giveaways that will be going on ALL month long.
See you Saturday! WAAHOOOO!!

PS. If you would like to post a button for my party on your blog sidebar, I would love you FOREVER!  
You can find it on the right hand side of my blog sidebar along with the text box(thanks Allison!).

Monday, September 26, 2011

5 Creepy Spider Finds

I am not a huge fan of spiders.  Especially the BIG ones.  This time of year, I am willing to put my fears aside and get out the scary decorations, and sometimes that includes spiders!  Here are some of my favorites I found on Pinterest.
I am lovin' these creepy crawly spider pumpkins.  You can find out how to make them at bhg.com

This spider in a jar, looks delicious!  Find it on blog.craftzine.com
These adorable Spider Krispies would be fun to make with the kids!  They can be found at Cookies and cups.com

Love, Love, this White Spider Pumpkin.  The bling is awesome! Find it at Bhg.com
What a creepy printable from Diary of Daves Wife

Hope you are having a fabulous Monday!  I start school today, yippieee!  I have a 3 hr. Math class starting in a few hours.  I am going to have a sore bum today:)



Saturday, September 24, 2011

My Memories Suite Digital Scrapbook Software Giveaway!

Lately I don't have a lot of spare time.  I am going to college, have 3 kids, and I am very active in my church.  I have been looking into ways to simplify my life while enjoying the hobbies I love. One of the things I love is  scrapbooking.3 years ago, I used to enjoyed traditional scrapbooking. I had (and still have!) drawers full of papers, stickers and embellishments.  I still love to do scrapbooking the traditional way, but I just don't have the time and it makes such a mess.
I have been thinking about getting a digital scrapbooking software but I just didn't  know which one was the right for me since I do not have a lot of computer skills.

When I was asked to review My Memories Suite Digital Scrapbooking Software I was so happy to try it out!  I have been wanting to switch over to digital scrapbooking for a long time.

What I loved about My Memories Suite is how easy, affordable and mess free this digital scrapbooking software is compared to dealing with paper scrapbooking.  For me the biggest appeal of this type of software is that those that I do not have the time, resources or patience for traditional scrapbooking and I can enjoy scrapbooking without purchasing fancy scissors,acid-free glue, papers and albums!

I was surprised, once I found my way around it, how easy it was to create beautiful pages!
It literally took me about 5 minutes to create these  pages:


My Memories Suite comes with a lot of template sets, paper patterns and embellishments. To add even more options,they offer free design downloads and hundreds of low-priced papers, templates and packs in their Design Shop. Using thisscrapbook software, you not only can create digital scrapbooks but also calendars, photobooks, videos and cards.


I honestly feel like this software is easy to use.  I am excited to make calendars for my family as well!

 My Memories Suite wants you to have your very own copy of the digital Software for FREE! and I want you to have it too!! 

GIVEAWAY GUIDELINES and open to everyone:

1 winner will receive My Memory Suite Digital Scrapbooking Software 
This giveaway will remain open until Saturday October 1st at midnight.
The winner will be chosen at random, notified by email and will have 48 hours to respond.

IN ORDER TO ENTER THE GIVEAWAY, go to My Memories Suite site and leave me a comment telling me which is your  favorite digital paper pack or layout.


BONUS ENTRIES: Please leave a separate comment for each entry

Like  My Memories Suite on Facebook
Follow My Memories Suite on Twitter
Follow MY Blog!

Readers of my blog can also receive a 10% discount of the fabulous digital software using the code STMMMS19109

Disclosure: I received  a copy of My Memories Suite to review and I am very happy I did, all the opinions are my own.


Thursday, September 22, 2011

Wood Post Pumpkins


I have been working on these for a few days and I am so excited to show these to you!!  I have to give credit to Maria over at You Craft me up!  She came up with this fabulous idea!  I absolutely L.O.V.E. how they turned out.  She even has a video of how to make the notches in your wood!  


You've got to check out all the other wood craft ideas she has on her blog.  She is one Talented Crafty lady:)

This is such an inexpensive gift idea.  The wood post was about $7.50 at Home Depot.  You can get 2 sets of pumpkins out of an 8ft. piece of wood.  She gives all  the details over on her blog!

Here's how mine turned out:


To make the "Pumpkin Patch" sign, I just found a piece of scrap wood that looked about the right size, painted it Burnt Sienna, cut out the letters with my Cricut and paper, then stenciled the letters on with Light Ivory paint.  EASY!


Halloween Blocks Giveaway Winner!

Congrats to Mrs. Prince!  She is the Halloween Blocks Giveaway winner!!  I sent you an e-mail Jessie, and I hope to hear from you soon:)  

Mrs. Prince said:
I'm a follower! they are so cute!

I will be back later today with an awesome Pumpkin Craft!!

Tuesday, September 20, 2011

Halloween Card and Spider Tags

Only 1 more day for the Halloween blocks giveaway!!  Click here to enter.

For a few years I was making Cards and Tags like crazy!  I love to give a handmade card!  I think it means a lot to people knowing that you made it.  Here are a few ideas for the Halloween Season:

This card is sooo easy to make!  You can buy pre-cut cards and envelopes, or you can make you own card by cutting down an 8 1/2 x 11 piece of cardstock to 4 x 6.  

Find some cute Halloween paper, cut it to size, then glue on the card.  I cut a coordinating piece of paper for the strip across the bottom.  

Then, using a scallop punch, I punched out a circle, added a the Happy Halloween sentiment which I just printed out off my computer.  I printed it out on printer paper.  EASY!  

For these tags, I simply punched a bunch of scalloped circles with my scallop punch, stamped the "Boo" and the spider with a cheap set of Halloween stamps,  punched  and cut them out, glued on the spider with a pop dot, and adhered the "Boo" with a tape runner. 

I bought some cute spider ribbon from Micheal's to finish off the tags!  I also edged the spider with black chalk ink. EASY and CHEAP!  

I challenge you to send out at least one handmade card this year!  You can do it!!  It's really fun too!  I would love to see what you made!

Linking here:
The Crafty Nest
Southern Lovely
A Little Tipsy
Related Posts Plugin for WordPress, Blogger...