 |
| Have a very Happy Halloween! |
Sunday, October 31, 2010
Saturday, October 30, 2010
Thanksgiving Tree- Gratitude
Have you ever to been to the blog Oopsey Daisy? She is a very talented and crafty woman. I love her ideas! I came across this Gratitude Tree on her blog today. Isn't it fabulous? I love it! There is even a tutorial with it. I am so excited to make it!! Go check it out~
Wednesday, October 27, 2010
Some inspiring Fall and Halloween projects
This is my very last Halloween post...I promise! I have to admit, I am getting a little sick of seeing Halloween decorations. I think I am ready for Christmas! I am working on more Thanksgiving decor as well. Sometimes that holiday gets overlooked, don't you think? Here are some pictures of all my Fall and Halloween crafts I have made recently. I love to decorate, so enjoy!
Have a great Halloween! I have some awesome Thanksgiving ideas coming soon.
 |
| These blocks are one of my favorite decorations. My teenage daughter carved the pumpkin. Nice, huh? |
 |
| Super easy paper tags. I used cheap stamps, scalloped paper punch and ribbon! |
 |
| This card was easy with a scalloped paper punch and I printed out the phrase. |
 |
| I usually don't like skeletons, but these are kinda cute little guys. |
 |
| Another easy card with scalloped paper punch and scrapbook paper. |
 |
| These little matchbox paper pads are super easy to make. Should I do a tutorial on how to make these? |
 |
| Love these vintage Halloween images. There is tons of free images on the Internet. |
 |
| More lovely Halloween vintage images. I got these from Etsy. |
 |
| Simple 2 x 2 cards made with scrapbook paper and cheap Halloween stamp. |
 |
| I made these with those foam stickers. I think I got them at JoAnns. |
 |
| These were simple to make with clear stamps I got at JoAnns. |
 |
| The letters were made with cardstock, cut from my Cricut. Old frame I spray painted. Cute little spider sticker I have had forever! |
 |
| I bought the grapevine wreath at Micheal's for $2.50. Leaves were about $2. |
 |
| Topiary I made with this tutorial. |
 |
| Trick or Treat wreath I made with this tutorial. |
 |
| I got this idea from several people's blogs. Love how it turned out! |
Have a great Halloween! I have some awesome Thanksgiving ideas coming soon.
Labels:
Autumn,
card,
crafts,
Fall,
Halloween,
matchbook paper pads,
spooky wreath,
Trick or Treat blocks,
wooden plaque,
Wreath
Sunday, October 24, 2010
Giveaway Winner!! I love Matthew Mead!
Congratulations Jesser! You are the winner of the Scrapbook Stash giveaway. I will e-mail you and let you know.
Here is what she said:
I love EVERYTHING about Fall! It means beautiful trees, Halloween, and Thanksgiving!
lavagraphicz@etex.net 1
lavagraphicz@etex.net 1
 | |
| Have you heard of Matthew Mead? |
 |
| Don't you love the decorating with Gourds? |
 | |
| More Gourds! |
 | |
| I love the colors he uses here. So pretty! |
 | |
| Better than Bling! This is so Christmasy...Love it! |
Have a great weekend!
Friday, October 22, 2010
Tomorrow last Day for the Scrapbook Stash Giveaway!!
Don't forget tomorrow (Oct 23rd) at midnight the Halloween Scrapbook Stash Giveaway ends!
If you haven't already entered, you still can. I am adding some more goodies to the stash, so hurry!
I can't wait to see who wins. Soooo many Fall/Halloween goodies!
My husband is in the process of transferring all my pictures onto a new computer (yay!! FASTER...) so if you want to see pictures of the goodies, click on "Current Giveaway" above on the tool bar. Thanks!
Tuesday, October 19, 2010
My top 5 favorite things about FALL
I absolutely LOVE Fall. It is my favorite time of year. Why, you ask? Well here are my top 5 reasons for loving Fall:
1. Honeycrisp Apples WITH Caramel - I look forward to every year when I can go buy some of these yummy apples from a nearby farmer. They are the best, juiciest apples you will ever eat!
2. The leaves changing. Who doesn't love this? It is the most breath taking sight I have ever seen!
3. Orange and White Pumpkins. I have a thing for white pumpkins. I think they are the coolest things ever created by God. I also love lots and lots of Orange ones!
4. Harvesting my Garden. I look forward every year to tomatoes from my garden. They are soooo much better than store bought ones! I also love corn from my garden. This year was a little disappointing because our corn didn't come up very well. It looked yucky!
5. Thanksgiving! I love to get together with family and have a feast! It's so fun to cook for it and eat until I feel like I am going to hurl:) I also have so much to be thankful for!
I would love to hear your top 5 as well! I love comments and I read every stinkin' one of them, so please....feel free!
Friday, October 15, 2010
Partay!! Over 500 Followers- I heart Vintage Halloween
Yes, these are 2 totally random subjects, but I am so honored to have over 500 followers now! Thank you so much all you lovely readers!! I can't believe I have been blogging for almost 2 years. Time does fly doesn't it?
Don't forget to enter my Giveaway that ends on October 23rd at Midnight! Click on the Giveaway link above and you can see all the goodies I am giving away. Because I am so excited about having over 500 followers, I am going to add a few more goodies to the loot! There are only 60 entries so far, so come on and enter!
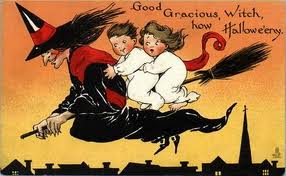
Now, onto the Vintage Halloween part. Have you ever googled vintage Halloween? Well, here are some fabulous pictures I found. Don't you just love them?
 |
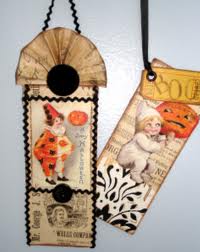
| Love these tags....especially the ric rac! |
 |
| Super cute kitties! |
 |
| How Halloweeny! |
 |
| Ok, I know this isn't vintage, but I thought they were so CUTE! It's a little choir of Ghosts! |
 | |||||||||||||
| I am pretty sure this picture isn't vintage, but I couldn't resist posting it....I think it kinda looks like Michael Jackson...don't you? |
Wednesday, October 13, 2010
Scary Halloween Recycled Juice Can Tutorial
I love to drink Wyler's Light (generic for Crystal light, but just as good!). I especially love the Raspberry Ice flavor:) But that is not what this tutorial is about.
I have had this empty can sitting around and I just knew there was something I could make with it. It sat on my kitchen counter for about 2 weeks, then yesterday, I finally figured out what to do!
Here is the lovely Tutorial. I hope you like it! I think I might make these for my child's class at school to put Halloween treats in:
You will need:
an empty Wyler's or Crystal light container.
1 can of black (or whatever color you prefer)of spray paint. I highly recommend buying your spray paint at Home Depot. They have the best price.
1- 8 1/2x11 or 12x12 piece of cute Halloween Scrapbook paper
2 different colors cardstock
button
Modge podge
glue gun
Spray the container with paint. Don't get too close or it will run. I learned this by experience. Also, don't spray on a windy day (also from experience).
Let paint dry. Mine dried in about 15-20 minutes.
This step is probably the hardest, but if I can do it, you can! Cut the scrapbook paper the size of your can. Brush a generous amount of Modge Podge around the can, then take the paper and carefully wrap it around the can, pressing the paper down as much as you possible. Your paper is going to bubble and wrinkle a little, but I think it adds to the cuteness of it, so no worries! (can you tell I'm not a perfectionist?) When you get the paper on, spread a thin layer of Modge Podge over the top of the paper. Let dry completely (1-2 hrs).
Now you may have lots of cute little do dads laying around you could glue on your can, and I had some of this cute pom pom ribbon, so I glued it along the top lip of my can. I love those little pom poms!
I also wanted to make a torn flower, so I chose 2 different colors of cardstock, ripped them in the sizes I liked, then I crinkled the paper in my hand. Next I flattened out the paper, then inked the edges with black chalk ink. Glue the button on the top of the flower.
Glue the flower where desired on can. Next I punched a hole on each side of the can (I used a crop-a-dile, but you can just use a reg. hole punch) and tied some cute Halloween ribbon on each side. I also think some ribbon wrapped wire would be cute too. I decided not to use my lid for this project.
Lastly, put some really yummy chocolate in side the can. I bought some of those new pumpkin flavored kisses. My 8 year old loved them, but I thought they were kinda icky....I will put some different candy in my next can.
Hope you enjoyed this tutorial! I enjoyed doing it. I can't wait to come up with some lovely crafts for Christmas....is it that time already?
I have had this empty can sitting around and I just knew there was something I could make with it. It sat on my kitchen counter for about 2 weeks, then yesterday, I finally figured out what to do!
Here is the lovely Tutorial. I hope you like it! I think I might make these for my child's class at school to put Halloween treats in:
You will need:
an empty Wyler's or Crystal light container.
1 can of black (or whatever color you prefer)of spray paint. I highly recommend buying your spray paint at Home Depot. They have the best price.
1- 8 1/2x11 or 12x12 piece of cute Halloween Scrapbook paper
2 different colors cardstock
button
Modge podge
glue gun
Spray the container with paint. Don't get too close or it will run. I learned this by experience. Also, don't spray on a windy day (also from experience).
Let paint dry. Mine dried in about 15-20 minutes.
This step is probably the hardest, but if I can do it, you can! Cut the scrapbook paper the size of your can. Brush a generous amount of Modge Podge around the can, then take the paper and carefully wrap it around the can, pressing the paper down as much as you possible. Your paper is going to bubble and wrinkle a little, but I think it adds to the cuteness of it, so no worries! (can you tell I'm not a perfectionist?) When you get the paper on, spread a thin layer of Modge Podge over the top of the paper. Let dry completely (1-2 hrs).
Now you may have lots of cute little do dads laying around you could glue on your can, and I had some of this cute pom pom ribbon, so I glued it along the top lip of my can. I love those little pom poms!
I also wanted to make a torn flower, so I chose 2 different colors of cardstock, ripped them in the sizes I liked, then I crinkled the paper in my hand. Next I flattened out the paper, then inked the edges with black chalk ink. Glue the button on the top of the flower.
Glue the flower where desired on can. Next I punched a hole on each side of the can (I used a crop-a-dile, but you can just use a reg. hole punch) and tied some cute Halloween ribbon on each side. I also think some ribbon wrapped wire would be cute too. I decided not to use my lid for this project.
 |
| I like the ribbon I used, but it wouldn't stand up. I'm ok with that.... |
 |
| Love the sweet little pom poms! |
 |
| Don't you love my cute little BOO blocks? My 8 yr. old insisted on putting the spiders on top. I think it adds to the scariness of it! |
Hope you enjoyed this tutorial! I enjoyed doing it. I can't wait to come up with some lovely crafts for Christmas....is it that time already?
I am linking with these parties:
Labels:
crafts,
Fall Autumn,
Halloween,
recycled wyler's light can,
tutorial
Subscribe to:
Comments (Atom)


