Monday, January 31, 2011

White Chocolate Marshmellow Pops

  I had some white chocolate leftover from like last Christmas or maybe even the Christmas before (it still tastes fine!).  I wanted to use it up.  I knew I had some big marshmellows, some leftover sucker sticks from making candy previously, and I had sprinkles!  Just what I need to make these yummy Valentine marshmellow treats.  Here are my not so organized directions:


First we melted that yummy White chocolate in the microwave.  Make sure you nuke it in 30 second intervals, then stir, or it will burn.  Believe ME, nothing is worse than burnt Chocolate...yuk!

You need the large Marshmellows, lollipop sticks (or toothpicks), and Valentine sprinkles! 
The sprinkles go EVERYWHERE!  I kept sweeping them up with my hand and pouring them on a marshmellow dipped in the chocolate (can't stand to waste it!).  After you've dipped one, let it dry on a piece of wax paper.  doesn't even stick, yay!
Aren't they perdy?
There she is enjoying her yummy treat!
I luurve all the pretty colors:)
That bugger was gone in about 10 seconds!

These were soooo easy.  It's quick and easy, and you have immediate satisfaction:)  They are really yummy.  Word of advice:  If you eat more than about 4 at a time, your tummy won't feel so good:)

Saturday, January 29, 2011

KISSES AND HUGS Wood Vinyl Lettering

I have to show you this next project I made this week.  I am so excited about it!
There is a little story behind this vinyl that I HAVE to tell you about!  Last Summer I went garage saleing (is that a word?) with my good friend Tami.  We went to this one sale and guess what I found?  About 10 pieces of pre-cut vinyl in different sayings for Easter, Halloween, Valentines day, etc.  It was....get this:  $1.00!!! For all of them.  I was giddy with excitement as I walked away from the garage sale!

Of course I haven't really done anything with them until this week!  I made this cute plaque with the Kisses and Hugs vinyl.  Can you see the cute little felt flower in the upper left hand corner?  Isn't it cute?  I tried so hard to get a close up of it, but I haven't quite figured out my new camera yet, and it kept coming out fuzzy.  So no close up. Sorry:(
I absolutely LOVE how it turned out!  I want to tell you how easy it was to make that felt flower.  For the best and easiest tutorial on how to make these...go here.
Fun, huh?

Have a great weekend and go do something crafty:)  Thanks so much for stopping by my humble little blog....

Thursday, January 27, 2011

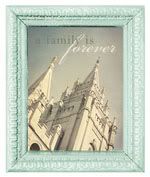
Love One Another Printable

I know there are so many cute printables out there and I want to have them all and decorate cute frames to put them in!  You should see my house.  Fabulous Subway art and cute sayings everywhere.  I love it.

The other day I found THIS one and it is so sweet!  Becky Higgins has so many fun things on her site.  You gotta go check out her blog!
Here is what is on the top of my piano:

Sooo simple, but adorable!
See the nice lamp in the top right hand corner?  I couldn't get a good picture without glares.  So lame.  I think I should add a cute felt flower or something. 
Go download your copy of it!  Have fun:)

Tuesday, January 25, 2011

Happy Birthday to my Blog! and My take on a Valentine's Banner

It just dawned on me today that I have been blogging for just over 2 years!  My first post was December 27, 2008 (and it was B-O-R-I-N-G).  WOW!  I can't believe it's been that long.  Time flies, huh?  I laugh when I look at my first few posts.  I had no idea what to say!

  In honor of my blog Birthday, I think I shall have a giveaway next week.  I am going to gather some AWESOME scrapbook stuff together for my readers to win!  I also have something special to give away as well!  It's a secret....but if you have a blog your gonna LOVE it!


This is off topic (I am all about off topic!), but I have to share with you my take on a Valentine Banner I made last weekend.  I love the way it turned out.  For some reason I could not get decent pictures of it though, so you will have to use your imagination.  It really does look cute! 
See what I mean about crappy pictures?  The lighting was terrible!
I used Basic Grey Blush fabric by MODA.  Luuurve that fabric!  Of course the backing was Burlap.  Then I used my Cricut to cut out the music paper.  I inked the edges with my brown chalk ink pad (my FAV!). 

Then I cut out my letters with the Cricut and inked the edges with the chalk ink again.  I just used good ol' Elmers glue to glue the letters to the music paper and then glued the music paper to the fabric. 

For the fabric, I used Heat 'n' Bond to adhere the fabric to the burlap.  It worked GREAT!   I found some pink ribbon in my stash and I sewed it to the burlap (a little tricky). DONE!  It's simple, but I love how it turned out.  Again, sorry the pictures aren't the greatest.  I am taking photography class online right now, so hopefully my pictures will begin to look better!

I have a few more goodies to show you this week.  I am so excited!  I now have plenty of Valentine Decorations.  Yay! 

Monday, January 24, 2011

Sick of Valentine's Decorations yet??

I can't help it.  I  keep making Valentine decorations! I really don't have that many Valentine crafts (until now!). I hope you don't mind if I share a few more with you this week.  Here is what I made on Saturday:


Since I bought 4 of these MDF boards at the Craft store the other day, I had to make another Valentine decoration!  I love how it turned out.

Follow the directions from this tutorial.   I added a cute heart cut out from old music paper, a clear "love" cut out, and a few chipboard hearts I had in my stash.  I also cut the XOXO with my Cricut and stuck it on the clear plastic window.  

I have a few other adorable crafts to share, but I will save them for later this week!  Thanks so much for visiting me.  Have a wonderful Monday!

Friday, January 21, 2011

Free Sewing Patterns?

Have you been to this website?? 

I just spent about 1/2 hour looking at all the free patterns!  I downloaded a ton.  I am so excited about this site.  I am not that great at sewing, but there are lots of easy projects there.  Here are some examples:

I LOVE market bags!  These look sooo easy!  Trust me, if I can so can you!!  HERE is the link to the pattern.
These would be so fun for Valentine's day!  HERE is the link to this pattern.  Again....EASY!

I love this classy Romantic Ruffle bracelet.  The gal who designed this is UBER talented!  HERE is the link to the pattern.
I love this corsage necklace!  The fabric is 2 die 4!  HERE are the directions.

This is just a drop in the bucket of what they have.  You have got to go check this site out!  You will be so glad you did:)

Thursday, January 20, 2011

Valentine's Day Fabric Wreath

There are so many fabulous versions of this fabric wreath out there, I just had to make one!  I love how it turned out and I added my own touch.

I hung a juice can lid in the middle, covered with a piece of scrapbook paper.  Then I put a cute valentine 3-D sticker in the center of the lid and hung it with ribbon.  Simple, but adorable!


I love how it brightens up my kitchen.  I smile every time I see it!

Monday, January 17, 2011

I Love You Picture Frame Tutorial

I was at the Craft store the other day (it's called Craft Warehouse).  I was really excited when I found these cute MDF frames for 1.50 each!  I bought 4 and wasn't really sure what I would do with them, but when I got home, my creative juices started to flow (love it when that happens!).

I call it a picture frame, but I didn't really use it as one.  Here are the supplies you need:

-frame
-mod podge
-craft knife
-brayer
-sand paper
-brown chalk ink pad
-pencil
-paint brush
-cute scrapbook paper (I used 1-12 x 12 piece, Bittersweet from Basic Grey)
-embellishments to decorate outside of frame
First, trace the shape of your frame on the paper.
This step looks kinda weird, but I am pressing my hand around the shape of the cut out in the frame on my paper, so I can cut it out with a craft knife.
Next I cut out the opening in the paper with my craft knife.  It actually worked pretty well the way I did it.  I wasn't sure how just pressing around it would work, but yay it did!  Sorry, I get excited about little successes.
Here is what it looks like cut out. 
Now is the fun part!  Coat that baby with lots of mod podge.  I just kinda slapped it on there with my brush.  Oh...look, I even left the price tag on!
This is a really important step.  This brayer is AWESOME!  It is the only way I have found to get all the air bubbles out from under the paper.  I just rolled it over the whole frame several times and no air bubbles!  Brayers are pretty cheap, especially with a coupon at JoAnns or Michaels.  Totally worth it if you use Mod Podge very much!
I have to apologize, because here is where I stopped taking pictures!  I got distracted doing the project, sorry! 

When the mod podge dried, I sanded around all the edges with sandpaper.  You may find that some of the paper hangs over the edges.  No biggie, just take your craft knife and cut it off, then resume sanding. 

After I sanded, then I took my cute little cats eye chalk ink pad.  The color I used was chestnut brown.  I love this little guy! I went around all the edges, including the opening in the center of the wood for the picture.  It's a little tricky, but you can just wipe off any ink you get on the window.  

For the striped paper in the center, I just traced the paper that was already inside the window on my cute scrapbook paper and replaced it with my paper.  Then I pushed it inside the frame opening and inserted the plastic frame cover that came with the frame.  
The hearts I used came from the Target dollar bins last year.  I just attached them on the outside of the plastic frame opening.  They are 2 dimensional, so were too bulky to stick on the inside.

The I and You were also chipboard letters from the Target dollar bins last year.  They matched perfectly!  I love how it turned out.  Super fun and easy.  It only took me about 45 minutes total to make!  
 
Have a wonderful Monday!!

Saturday, January 15, 2011

Heart Burlap Wreath

I have fallen in love with this wreath!


And I just can't stand how COOL these are! 


I have recently discovered a very Lovely blog and the name of it is sooo adorable!

Go check it out this blog!  There are so many fabulous ideas!

Oh..... and Monday I am going to post a UBER cute Valentine Craft!  Come visit....

Wednesday, January 12, 2011

Giveaway Winner and Adorable Burlap Pillow!

Sorry I am a little late posting the winner of the Giveaway.  I had school today and I just got home!  Well, here is the Winner:

Congrats Ashley of Ash Creations!  You are the winner of the Scrapbook Goodies.  Here is what Ashley said:

Subscribed to your RSS feed.

ashj.allen(at)yahoo(dot)com

I will be e-mailing you today Ashley!

I just had to show you this CUTE pillow my friend Andrea made for me.  I was so excited when I saw it was made out of burlap!  LOVE IT!  Check it out:
I love how she stamped my nickname on it with paint!  The flowers are adorable too!

I am lovin' all the cute things people are making with Burlap out in blogland!  Here a few other of my favorites:

Isn't this Burlap bird cute?  I found it here.


This is actually Burlap ribbon!  So cool.  I found this here

Lovin' these sweet Burlap flowers!  Find the tutorial here.

I  LOVE THIS WREATH!  I have to make one of these soon!  I found it here.

Go buy some Burlap and make something!  I am inspired.....

Related Posts Plugin for WordPress, Blogger...