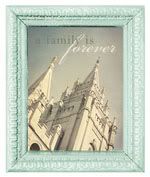
I made this back in August and completely forgot to post about it. It has been one of my favorite Thanksgiving crafts that I have made recently!
I love that it is from a repurposed piece of art that I bought for about .50 cents at Salvation army! I love a cheap project.
Here is the Before and After!
I personally LOVE the after WAAAY better, but that's just my personal opinion:)
Here's a quick tutorial of how I made it:
1.) I painted over all the wood using these colors:
These are my favorite FALL colors!
Hauser Medium Green and Burnt Orange.
2.) Sand the heck out of the edges with a palm sander or you can just use a piece of sandpaper!
3.) I guess I forgot to take a picture of applying the paper, but you have seen this before. I used Mod Podge to adhere it, then another layer over the top of the paper. Remember to use something hard and flat (like a pampered chef scraper) to keep the paper from bubbling! Then ink the edges. I used Tim Holtz Walnut distress ink. It's fantastic!!
4.) Adhere the vinyl, or use a stencil. Done!
I have this hanging on the wall so you can see it right when you walk in!
Have a fabulous Friday!


What a transformation! Love the quote and the colors! :)
ReplyDeletewhat a wonderful idea AND that saying is just so perfect (and more importantly true!)
ReplyDeleteJust perfect! The transformation and the sentiment!
ReplyDeleteLove it. What a great reminder for us all. Would you link this up to my Giving Gratitude Link Party on A Mother Seeking?!
ReplyDeleteMeredith From A Mother Seeking Come find me on my blog, A Mother Seeking...
Love the quote! I may have to use it on a last minute Thanksgiving card!
ReplyDeleteHugs, antonella :-)
Sorry, I'm stopping in a little late from the Answer is Chocolate BFF Link Party!