Showing posts with label scrapbook paper. Show all posts

Friday, October 14, 2011

Today's Guest: Lil' Luna

Hi there!


My name is Kristyn, and I blog over at Lil' Luna!

I like to blog about all things good -
recipes, tutorials, crafts, tips, deals - you name it!


Right now I have The Great Pumpkin Series going on right now where all sorts of bloggers are showing you some Pumpkin Goodness. Come on over and check it out!

I don't know about all of you, but I LOVE this time of year.
I LIVE for the holidays.
Seriously - they make me giddy!

Well, as I was busting out some Holiday Decor I realized I needed to make a simple but fun bunting banner to hang from my entertainment center for Halloween. This is what I came up with.


So easy and fun!
Here is how you do it...

SUPPLIES:
-Scrapbook Paper
-Cardstock
-Ink Pad
-Sewing machine
-Glue Stick
-Hole Punch
-Ribbon/Tulle

DIRECTIONS:


1. Begin by deciding what shape you want your banner. I thought half circles would be great and just traced half a bowl for my scrapbook paper pattern. I also traced a slightly larger bowl for the cardstock pattern. Trace and cut out for your scrapbook paper and cardstock.

2. For an added vintage touch, distress the edges of your paper with a stamp pad.

3. You will then glue your scrapbook papers to their coordinating cardstock paper.


4. From there, sew a zig-zag stitch all the end of your scrapbook paper.

5. Hole punch the top sides of each half-circle, string with ribbon or tulle and hang. :)

What's great about this is I want to hang the banner all year long and have made papers that match my room decor. I'm also planning on making some red and green half-circles for when Christmas hits and will probably do the same for the other holidays. :)

I hope you like it!


Be sure to come on over to Lil' Luna and say hi! I'd love to have you! 


XO - Kristyn
Isn't she Uber talented?  Thanks Kristyn for partying with us today!!
Kristyn has so many cute ideas on her blog.  Here is one of my favorite's:
I have wanted to make these forever!  You can find the tutorial here.

Tuesday, September 6, 2011

Vintage Happy Halloween Wood decor

I told you about my goal to use up my vinyl lettering that I have had sitting around my house forever, right?  Well here is the fun wood decor I made with the spooky looking "Happy Halloween" lettering.


First I painted the wood orange with Delta Ceramcoat paint.  
After letting it dry, I applied the lettering.  I love the font...don't you?


Next, I let the wood sit around my house for about 1 month without doing a thing to it!
It needed something more, so I stamped the bats on with a rubber stamp and black acrylic paint.


  I had some cute little vintage Halloween pictures that I purchased on Etsy as a download.  They were like $2 and I can used them over and over again.  I matted the vintage picture with some cute Halloween paper and used some pop dots to attach it. 
To finish it off, I edged the wood with black paint.  I just used a paper towel and rubbed it around the edges.  Soooo easy and very cheap.  The vinyl was free, the wood was in my garage, I had the paint and the only cost was the vintage image!  

Thanks so much for stopping by!  My kids started school today and I am looking forward to having a little more time to craft.  Then I start school in 3 weeks!

I am linking with these awesome parties:
Tip Junkie
Funky Polka Dot Giraffe

Thursday, August 4, 2011

Giveaway over at A Glimpse Inside!


If you would like to win some Scrapbook loot, head on over to A Glimpse Inside and you could win this:

Allison is celebrating her 1000 follower.  Isn't that cool?  She is having tons of giveaways.  Go check them out!

Monday, June 13, 2011

Summer Mod Podge metal sign

There is a craft store near my house that is going out of business and let me tell you I have gone there 10 5 times at least in the last month or so.  So needless to say I have purchased a few things to make some fabulous crafts to show you!

One of the things I bought was what I think is some kind of metal or tin, but I'm not sure.  It cost me about 3 bucks and I bought 2 of them.  They came blank and here is what I did with one of them:

Here is what I did to it:
I turned it upside down and traced the shape  on the scrapbook paper.  
Cut out the shape.
Mod podged the paper on the sign.
Cut out the letters with my Cricut.  
Coated the sign with 1 more layer of mod podge.
Hung it with pretty ribbon!
Done.


Super easy and I think it turned out pretty good!  It probably took me a total of about 1 hour or so with drying time.
Here's how I am displaying it.

Have a great day!!

I am linking with these parties:
Craftomaniac
The Creative Itch
Someday Crafts
Sisters Stuff
Lil Luna

Monday, May 2, 2011

Giveaway over at Sugar Bee Crafts

Hello my lovely readers!  I am having a TON of giveaways this month.  Right now I am having a FABULOUS giveaway over at SUGAR BEE CRAFTS.  Here is a little peek at what I am giving away:

 Some pretty YUMMY stuff, huh?  You need to go over and check it out.  Mandy has such an AWESOME blog too.  So much craftiness in one place!!  She is UBER talented. 

Thanks so much for your support!  I sure appreciate you!!

Tuesday, March 29, 2011

Cute SPRING Blocks

Oh Boy, it's only my second day of school and I have the worst head cold in the universe!  I ran a mile today in my running class and now I feel even worse (but at least I exercised!). 

I am posting a set of blocks I made a while back.  I guess I forgot to post them, or thought nobody would care!  Well, I want to show them to you anyways:)  I think they turned out pretty darn cute.

I used some scrap wood I had laying around, Basic Grey scrapbook paper, Mod Podge and my best friend Cricut for cutting out the letters! 

Take a lookey:


I got that cute little birdie at Micheal's for about 3 bucks!

I think I used the Don Juan Font on my Cricut.

Happy Spring!!

I am linking to these parties:
Blue Cricket Design

Sunday, February 20, 2011

Guest Post: Cute Dog Tags with Scrapbook paper

Last week I guest posted this on http://ready-set-create.blogspot.com.  Thanks Aleesha!  Here is my cute Dog Tags that I Mod Podged scrapbook paper on with some adorable embellishments!  Super easy and FUN!!

Here is what you will need:
-Dog tag (purchased HERE)
-Mod Podge
-a piece of pretty patterned scrapbook paper
-craft knife
-self-healing cutting surface
-glue gun
-paper flower or whatever you want to embellish your necklace with!
-emery board
-ribbon or ball chain

Here we go!  First put your dog tag down on the wrong side of the scrapbook paper and trace around it like this:
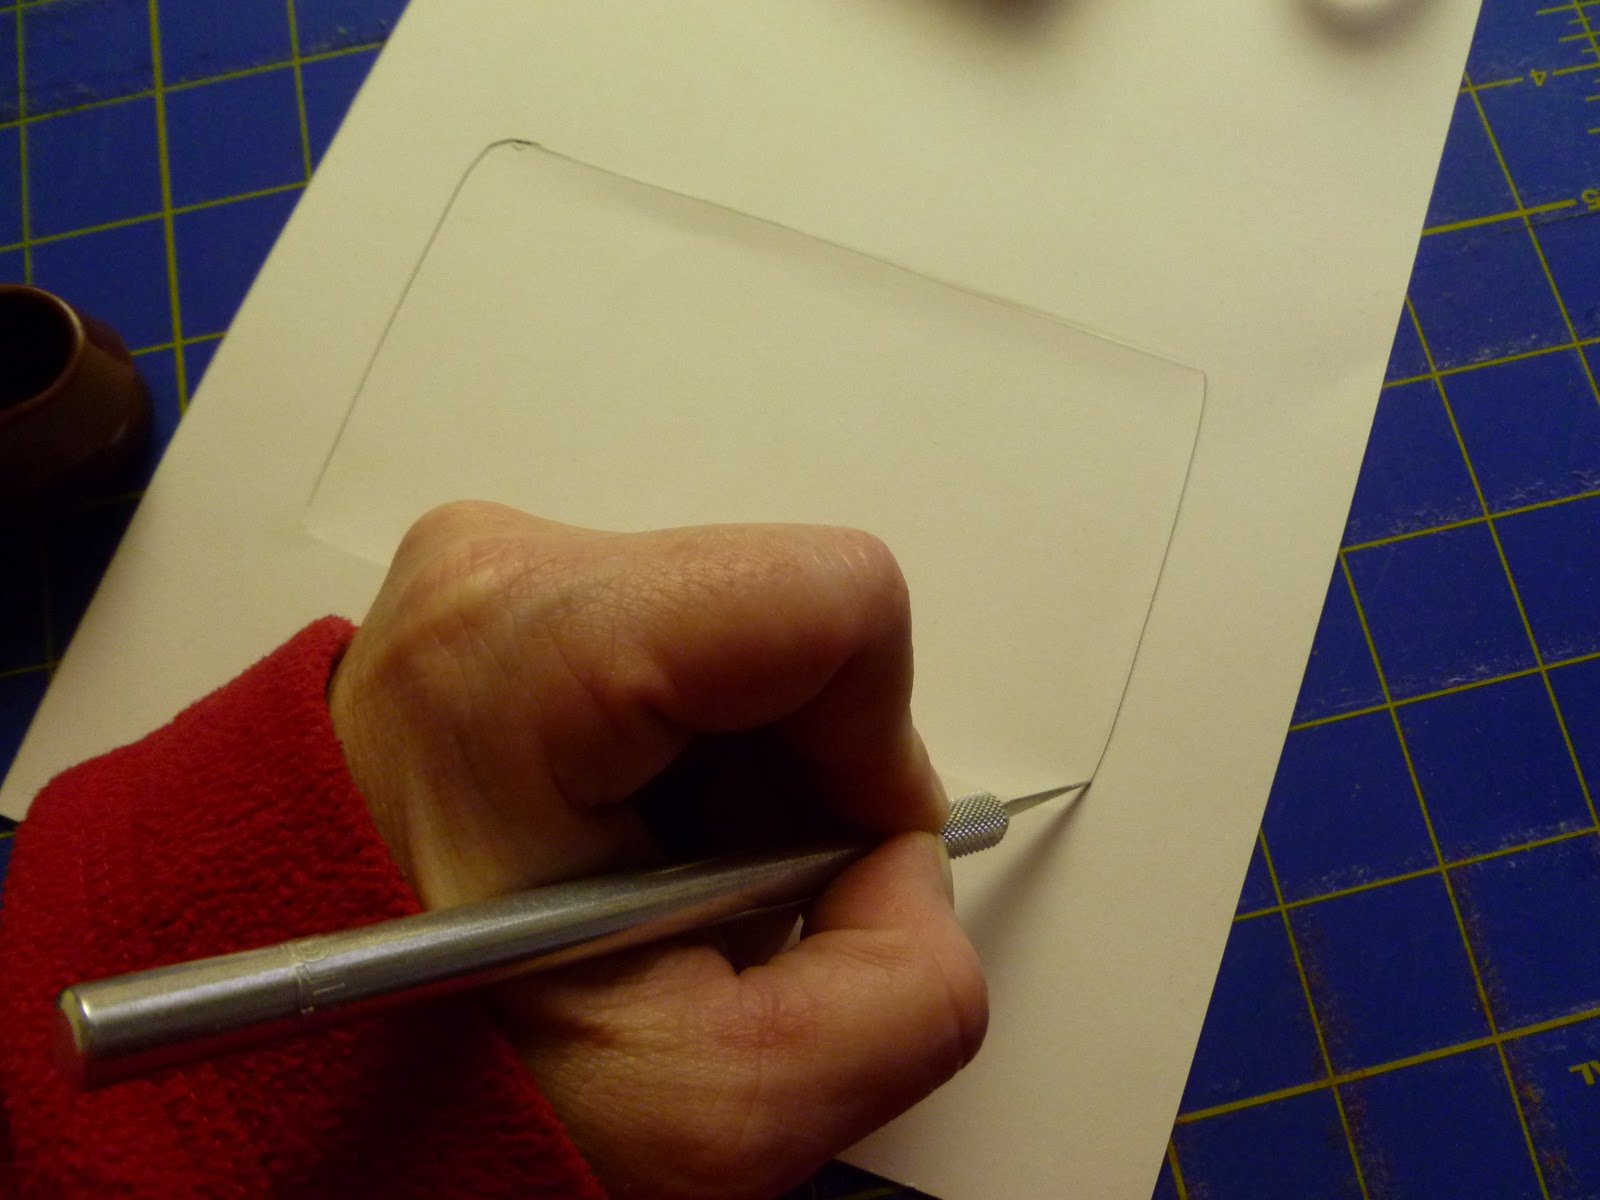
Next, cut it out with the craft knife, being careful not to rip the paper.
Then, slap some mod podge all over the wrong side of the paper and glue that baby on the dog tag, matching up edges. Let it dry for about 1/2 hour.  Then add a letter sticker for whoever you are making it for.  Add some more mod podge on the top of the paper once you have attached the paper to the dog tag.
OOOh, love that nice blue mat!  Yes, it has been well used.

Let the mod podge dry for at least 1-2 hours.  Then using an emery board, sand gently around the edges, making sure you are working down, so not to lift the paper off the dog tag. 

Next add embellishments!  I added a paper flower with a pink round pearl in the center.OOPSEY!! I couldn't tell where the glue was going.  It's hard to take picture's while you are crafting:) You get the idea, right?

Here is the finished necklace!  I used a pink ball chain that I purchased HERE
Here's another one I made. 
I am linking to these parties!!

Craft-O-Maniac
Under My Umbrella
Skip to My Lou
C.R.A.F.T. 
Keeping it Simple

Friday, February 11, 2011

I am hosting a Giveaway Night Owl Crafting!

If you like Scrapbooking or Cardmaking, you have got to run over here and enter my giveaway!  Here is what you could win:
Doesn't that look YUMMY??  Go to Night Owl Crafting for the details.  It ends in a 2 days.  There are several other fabulous giveaways to enter as well!  Good luck!!

Monday, January 17, 2011

I Love You Picture Frame Tutorial

I was at the Craft store the other day (it's called Craft Warehouse).  I was really excited when I found these cute MDF frames for 1.50 each!  I bought 4 and wasn't really sure what I would do with them, but when I got home, my creative juices started to flow (love it when that happens!).

I call it a picture frame, but I didn't really use it as one.  Here are the supplies you need:

-frame
-mod podge
-craft knife
-brayer
-sand paper
-brown chalk ink pad
-pencil
-paint brush
-cute scrapbook paper (I used 1-12 x 12 piece, Bittersweet from Basic Grey)
-embellishments to decorate outside of frame
First, trace the shape of your frame on the paper.
This step looks kinda weird, but I am pressing my hand around the shape of the cut out in the frame on my paper, so I can cut it out with a craft knife.
Next I cut out the opening in the paper with my craft knife.  It actually worked pretty well the way I did it.  I wasn't sure how just pressing around it would work, but yay it did!  Sorry, I get excited about little successes.
Here is what it looks like cut out. 
Now is the fun part!  Coat that baby with lots of mod podge.  I just kinda slapped it on there with my brush.  Oh...look, I even left the price tag on!
This is a really important step.  This brayer is AWESOME!  It is the only way I have found to get all the air bubbles out from under the paper.  I just rolled it over the whole frame several times and no air bubbles!  Brayers are pretty cheap, especially with a coupon at JoAnns or Michaels.  Totally worth it if you use Mod Podge very much!
I have to apologize, because here is where I stopped taking pictures!  I got distracted doing the project, sorry! 

When the mod podge dried, I sanded around all the edges with sandpaper.  You may find that some of the paper hangs over the edges.  No biggie, just take your craft knife and cut it off, then resume sanding. 

After I sanded, then I took my cute little cats eye chalk ink pad.  The color I used was chestnut brown.  I love this little guy! I went around all the edges, including the opening in the center of the wood for the picture.  It's a little tricky, but you can just wipe off any ink you get on the window.  

For the striped paper in the center, I just traced the paper that was already inside the window on my cute scrapbook paper and replaced it with my paper.  Then I pushed it inside the frame opening and inserted the plastic frame cover that came with the frame.  
The hearts I used came from the Target dollar bins last year.  I just attached them on the outside of the plastic frame opening.  They are 2 dimensional, so were too bulky to stick on the inside.

The I and You were also chipboard letters from the Target dollar bins last year.  They matched perfectly!  I love how it turned out.  Super fun and easy.  It only took me about 45 minutes total to make!  
 
Have a wonderful Monday!!

Monday, October 4, 2010

HUGE Scrapbook Goodies Giveaway

Friday, November 12, 2010

Scrapbook Supplies Giveaway!!

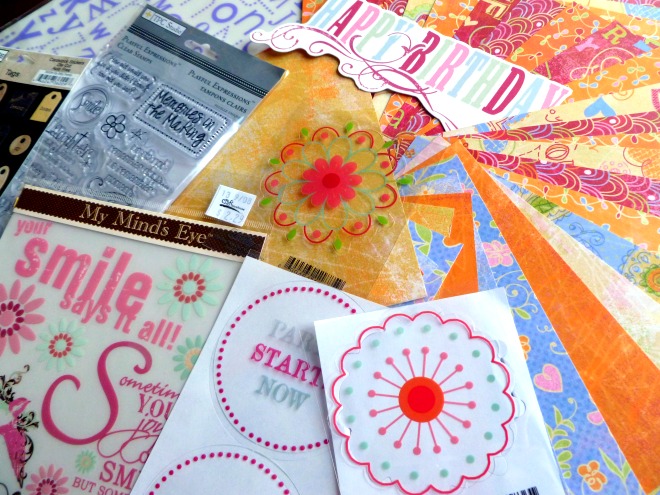
Well, here it is Friday and I told you I was having another GIVEAWAY and here it is!  I put some super cute paper, stickers, stamps, ribbon, and more together to make this fabulous Giveaway:


This Giveaway includes:

-24 sheets of 6x6 paper (4 sheets of each design)

-1 package Heidi Grace raised flower accents (49 pieces)

-1 package Heidi Grace Raised Button accents (11 pieces)

-3 yds. American Crafts Premium Ribbon (Blue,Green and Orange stripe)

-1 My Minds Eye Laundry Line Flirty "Play" Clear Stamp

-1 Heidi Swapp Clear Stamp "Enjoy"

-1 3x5 Artist Canvas Panel

-1 Card making kit (makes 4 cards)

Everything I am giving away is brand new in the package, except the "enjoy" stamp.  It is brand new and has never been used, but is not in it's original package.


Here is how to enter (please leave a separate comment for each entry):

1.  You must be a follower of my blog to be entered to win.  I love my readers....I promise you won't be disappointed!

2.  "Like" me on Facebook

3.  Follow me on Twitter

4.  For 2 extra entries, leave me a comment stating what you LOVE about Thankgiving.

5.  For 3 extra entries, Blog about this Giveaway.   Please leave me your blog link.


This Giveaway will end Sunday, November 28th at Midnight.  U.S. and Canada only.

Good luck everyone and Thanks so much for Entering!!

Thursday, November 19, 2009

Tutorial How-To Scrap paper Ball Ornament


WOW! I can't believe what a slacker I am. Life has been so crazy lately, it hardly seems like there is time to do everything I want to do, so something got put on the back burner and yep, it was my Blog!

Well I am back and I have a fun Ornament you can make with a plain ball ornament and scraps of paper! Here's how it goes:

First go purchase some of those clear balls at Micheals, Joanns, or your local craft store. They aren't very expensive, especially if you have a 40% off coupon!

Next find a bunch of scrap paper (I used scrapbook paper) and cut them into long thin strips )about 2 x 6 inches.

Take each strip and roll them into a circle. It's kinda fun!

Now take the top of your ornament off, and stick the paper inside the hole at the top. You have to roll the paper really tight to get it in there, but it will loosen up once it gets in. It is fun to use lots of different paper, that coordinates, but you can pretty much use any colors. I usually use about 6 or 8 strips of paper. Use enough to fill up most of the inside of the ornament.

Next, put the top of the ornament back on, and tie some cute ribbon onto the top where there is a loop for hanging. I put 2 or three different colors of ribbon.

I love these ornaments and think they are so adorable! They are a great gift. You can personalize them for someone special, by using their favorite colors, favorite sports scrapbook paper, holidays, etc. The possibilities are endless! I hope you will try this out and let me know how it went.
Good Luck to you and I hope you have a Happy Thanksgiving!

As always, I appreciate your comments and if you have any questions, feel free to e-mail me: kweight@byu.net
Related Posts Plugin for WordPress, Blogger...