Saturday, November 3, 2012

Washi Tape Checkerboard Clipboards

Hello, Pocket Full of Pink readers! I’m Ginger & I blog over at Ginger Snap Crafts.
I’m so excited to be hanging out over here at Karen’s while she’s away!
Happy Anniversary!  I hope you guys have a blast!

Today I’d love to share my {washi tape} checkerboard clipboards!
The kiddos are in full swing at school, & this is the perfect project for them.


For this project you’ll need clipboards,
washi tape {I found mine at Target}, an X-ACTO knife & scissors.


I started off at the bottom of my clipboard & placed my horizontal washi tape strips on first. 
I went all the way to the top of the clipboard.  So your clipboard will all be the same color. 
Then I started on my vertical strips with a different color of washi tape. 
I used my X-ACTO knife cut small lines in the tape using the tape underneath as a guide.
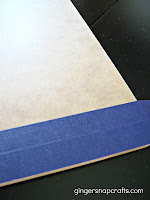
  
Then you remove the squares that you don’t need. 
Then you just keep on going until your whole clipboard looks like a checkerboard! 

  
Wouldn’t these make awesome teacher gifts? 
You could make them using your school colors!


Karen, thank you so much for having me over!

I’d love for YOU stop by Ginger Snap Crafts sometime.
It’s a place where I share my cute & easy crafts like these:


I also have a fun link party on Wednesdays!
I would LOVE meet you & see what you are up to! :)
Ginger Bowie gingersnapcrafts.com

Friday, November 2, 2012

Yummy Cheerios Treats!

Hey Pocket Full of Pink readers! I am Jourdan from Two Million Miles and I am so excited to be posting over here today! I hope Karen is having a fabulous time on vacation and enjoying a few rays of sun for me, while I am sitting here freezing my tush of!
{My sweet son, Karsyn, and I at the Circus a few months ago!}
At Two Million Miles, I blog about my three businesses {Jourdan's Jewels, Jourdan's {Handmade} Jewels, and Perfectly Posh with Jourdan}, life, crafts, recipes, and whatever else I can think of!
Today, I am going to share one of my most favorite treats. I eat them as fast as I can make them. They are quick, easy, and DELICIOUS.
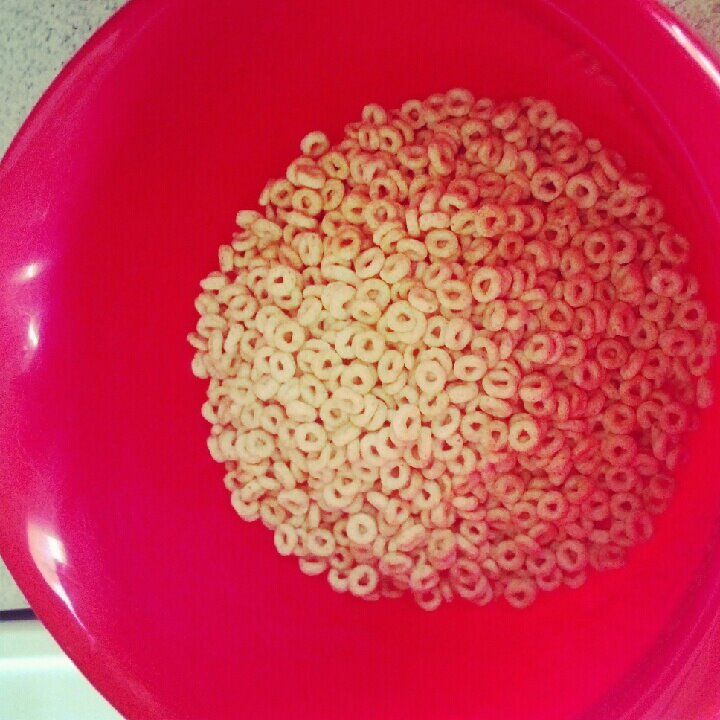
**WARNING: These treats are HIGHLY addictive. I have made them twice in the last five days. (; Here's what you'll need: *1 cup corn syrup *1 cup of white sugar *1 teaspoon of vanilla *1 cup of Peanut Butter *5 cups of Cheerios First step: Combine the corn syrup and sugar in a large sauce pan. Then stir it together and bring to a boil on medium heat for one minute. Then remove it from the heat and add your vanilla and peanut butter. Stir until smooth. Next, pour your Cheerios in a large mixing bowl. Then you pour your peanut butter mixture over the Cheerios. Then stir until the Cheerios are evenly coated. Lastly, scoop them out however big you want them and place them on tin foil or wax paper to set up. Enjoy!! So there you have it! Enjoy! I hope you will stop on by my blog and check it out. Thanks for having me, Karen! (:

Ooooh, those look so yummy!  You could also add some Halloween or any colored M & M's and give them for neighbor gifts! I may have to try this:)

 Thanks so much for stopping by Jourdan! 

All Things Fall with Live Laugh Rowe

Hello readers! I'm Kelly from Live Laugh Rowe.
I'm tickled silly to be here today! If you aren't familiar with me or my blog, I would summarize it as a creative lifestyle blog that shares crafts, recipes, home projects, DIY tutorials and life's moments. I'm originally from the East Coast, but currently living in St. Louis, MO. I miss the east coast very much! However, I also know that I am where I am for a reason. I thought I would briefly introduce myself and share a few of my favorite projects.
.
First let me say that this is my absolutely-positively favorite time of the year. I {love} Fall and Winter. I {love} the temperatures, sights and sounds that pass through over the next couple of months. And don't even get me started on the tastes and smells. Right now I'm enjoying my Pumpkin Spice Latte and Pumpkin scones. Other festive activities I'm enjoying right now includes apple picking.
And returning home to whip up some Apple Crisp.
Making Apple Crisp also happens to be on my Fall Bucket List {printable available here}. Then there's the fall decorating fun. My home has hints of fall all over it. Can you guess which of these arrangements are mine? Check out how you can do this yourself! Sometimes keeping things simple is necessary too! How about corn husk votives and vases?
If you don't decorate for fall, let me share a fun and easy festive 'sweet' treat. Candy Corn Painted Pots. Seriously, how cute are they?
My question for you is this -- what is your favorite time of the year? Spring, Summer, Fall or Winter? I'd {love} to know! Thanks so much for having me, Karen! And it was a treat meeting all of you -- the lovely readers! If you swing by my blog, please be sure to let me know.
. Subscribe to Updates | Like on Facebook | Follow on Pinterest

Thursday, November 1, 2012

DIY Burlap Rosette Wreath

Hey everyone!  I am Brooke from Babblings and More.
We are SO excited to be a guest on Pocket Full of Pink!  I am one of four sisters who contribute to Babblings and More.  My sisters and I started our blog to keep in touch with one another and show each other what we are up to after we all got married and moved away.
We named our blog Babblings and More because babbling means to utter a meaningless confusion of words and that is exactly what we do!  In fact, my dad still calls me Babbling Brooke...


Today we are going to show you how to make this Burlap Wreath!  It is SUPER easy and is adorable!

Materials Needed:
18 inch Foam Wreath- purchased at Hobby Lobby
Burlap- 1 yard of darker burlap and 1/2 yard of lighter burlap.
Contrasting Material- Just to add a hint of color
Scissors
Hot Glue Gun and Sticks
Pins


Step 1- Cut the Burlap into strips and start to wrap it around the wreath.


Step 2- Pin the Burlap in place. 


Step 3- Wrap the entire wreath with the burlap.


Step 4- Make flowers as shown HERE and glue them onto the burlap covered wreath.


Step 5- Hang on your door or wherever you want to put it!


Thank you SO much for having us at Pocket Full of Pink today!  We LOVE meeting new people and making new friends!  So stop by and visit us at Babblings and More!
Brooke 
 
So pretty!  I love the colors!  These girls from Babblings and More are so talented!  Thanks for stopping by my blog ladies:)

Monday, October 29, 2012

Making your own Mosaic Art

Hi all!  My name is Bronwyn and I usually hang out at my blog, Queen B Creative Me.  I am so pleased that Karen asked me to guest post on her fabulous blog while she is on vacation (lucky girl!)

I am currently re-doing the kids bathroom, taking it from a plain, uninspiring turquoise zone (I decorated it originally when I had just given birth to my 3rd child in 4 years - I had no spunk for anything interesting!) to a fun, zippy place that will kick-start my kids for school each morning!

Like many, I have really fallen for the turquoise and red colour-combo you see everywhere these days. Bright and cheery and perfect for girls and boys (I have 2 boys and 1 girl).
I recently stenciled the main wall and switched to bright red towels and floor mat.  I have some framed pictures I'd like to hang, but other than that, there is nothing on the walls. 
 After many months searching out the perfect art for the room, I have given up shopping and started creating.  
That is how I came up with MAKING YOUR OWN MOSAIC ART.


What you will need:

~ to continue with my red and turquoise theme, I chose several shades of aqua and red cardstock
~ an artist canvas (mine is 14"x18")
~ white glue (or Mod Podge)
~ a sponge brush
~ scissors or paper cutter 
~ craft paint in your chosen background colour ( I used plain white!)


1. First, cut your cardstock into 1"squares.  I began by cutting long 1"wide strips then chopped them into 1"squares. 

2.  Paint your artist canvas using your chosen background colour. 

3. The main image in my mosaic is a heart.  To draw an accurate heart shape, I cut one from scrap paper and traced around it on my dry canvas.  I also planned where my turquoise/aqua stripes would go and drew pencil lines for those on the canvas as well.  

4.  Here is where the white glue or Mod Podge comes in.  If you have chosen to use white glue, pour some in a container and add some water.  It should be the consistency of cream.  

Spread some glue/podge on the area where you will begin your mosaic- in my case, the heart.  

5.  Using your chosen colour, begin to outline the main image with the squares.  

6.  Once the outline has been laid, spread more glue/podge on the canvas and add more squares, filling the shape.  Turn the squares until they fit.  You may have to trim some and make some smaller squares.  


7.  Begin filling the background.  I chose to add 3 bands in shades of blue.  A solid background would be effective, too.   


8.  As I filled the empty space, I tried to paste the squares in a brick-laying fashion, overlapping the squares so that they were not glued in a grid pattern.


9.  Once you have glued all of your squares, cover the whole canvas with another layer of glue/podge.  This will seal the canvas and guarantee that the squares will not pop off.  


10.  Within hours your art will be dry and ready to display. 

Here is my mosaic in my children's bathroom:

Thankfully the children are very complimentary about my foray into the "art world."

In fact, my daughter has already requested another mosaic for her bedroom.
  I wonder if I can make Sleeping Beauty out of 1" squares??


I love this!  The blue and red look so great together!!  Thanks so much for stopping by Bronwyn! 

Guest Post: Live, Teach, Create

Well hello y’all! Before I begin, I must take the time to be thankful for being a Guest Blogger here on “Pocket Full of Pink”. I am so happy to have been asked to come back and happy to be here. So where do I begin? My name is Jennifer Smith-Sloane and I am a 30-something wife, teacher, mother to several dogs, country girl and all around creative person. I am currently in my 9th year teaching and am doing what I love. I moved down this year to teach 7th grade (from 8th) and added in Resource Math for 7th and 8th as well as a 2nd section of school newspaper. Yep, I’m a busy girl! I have been a creative soul for as long as I can remember and love every aspect of creating things whether it be for myself, my home, my family, my friends or my classroom. I was an avid scrapbooker up until this past summer. I still love the craft but my teaching has taken over with all that is on my plate. I have now been able to express my creativity in the form of making things for my classroom. My creative side has merged with my Masters in Curriculum and formed an amazing bond. [caption id="attachment_2665" align="aligncenter" width="300"] Click on the picture to be taken to the item in my TpT store![/caption] Every night you can find me creating something for use in my classroom from activities, to games and various different Flippables (folding graphic organizers) for our Interactive Notebook. It has totally become my passion and I am LOVING all the time that I spend on creating for my students (and other’s students). Because of this passion, I opened a store on Teachers Pay Teachers where I, among over 14,000 other sellers, are able to share creations we have made for our students with other like-minded teachers who want to find amazing things to use in their classroom to improve the lives and learning of their students. Since I teach middle school, many of my products are geared to grade 5-8 but I have started creating more that are geared to lower levels (K-4) due to the needs of my Resource Math classes. [caption id="attachment_2405" align="aligncenter" width="300"] Click on the logo to be taken to my TpT Store![/caption] As a teacher, I am constantly on the lookout for new and impressive ways to benefit the learning of my students. Going outside the box is my mission on a daily basis. I’ve recently filmed some videos of things I have created for my classroom and thought it would be a great time to share them with the public. Each of these activities are things that are not only created by me but tested by my students. They are my first trial for everything and I value their feedback that middle-schoolers are so proud to hand out. Not to leave you high and dry, but I have created a freebie for all “Pocket Full of Pink” members. In this freebie you will find a nice mix of Pink items that I’ve bundled together for you into a “Pocket Full of Pink Giveaway” bundle. To download, you will need a TpT account (it’s free) and then you can go straight here to download the bundle! I do hope that you are able to use the items or link them on to someone who can. Feel free to share the link for others to download and I would love feedback to be left if you feel so inclined! Thank you for allowing me to share a bit about myself today here on “Pocket Full of Pink” and I do hope that you might come check out my blog, Live.Teach.Create, or take some time to follow me on Facebook or Twitter (personal) or Twitter (teacher side).
Related Posts Plugin for WordPress, Blogger...