Showing posts with label recipe. Show all posts

Friday, November 2, 2012

Yummy Cheerios Treats!

Hey Pocket Full of Pink readers! I am Jourdan from Two Million Miles and I am so excited to be posting over here today! I hope Karen is having a fabulous time on vacation and enjoying a few rays of sun for me, while I am sitting here freezing my tush of!
{My sweet son, Karsyn, and I at the Circus a few months ago!}
At Two Million Miles, I blog about my three businesses {Jourdan's Jewels, Jourdan's {Handmade} Jewels, and Perfectly Posh with Jourdan}, life, crafts, recipes, and whatever else I can think of!
Today, I am going to share one of my most favorite treats. I eat them as fast as I can make them. They are quick, easy, and DELICIOUS.
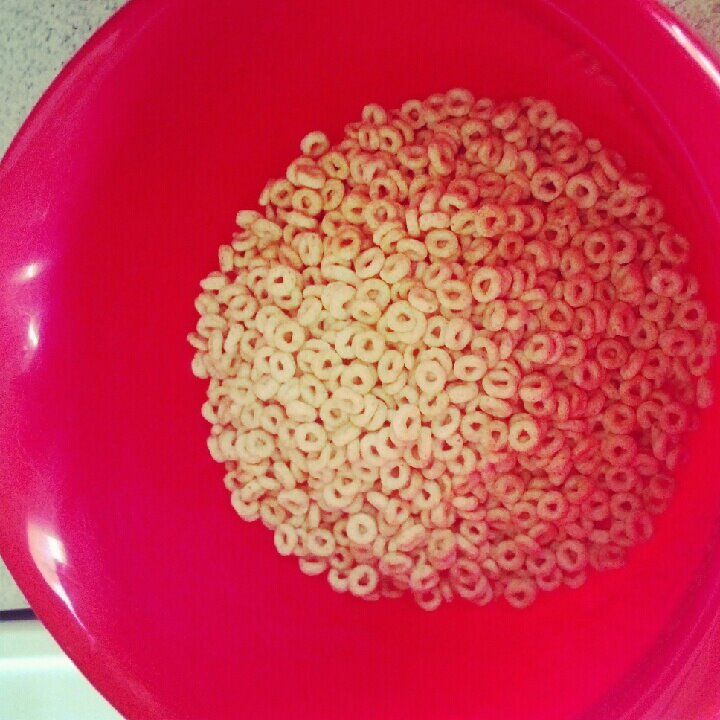
**WARNING: These treats are HIGHLY addictive. I have made them twice in the last five days. (; Here's what you'll need: *1 cup corn syrup *1 cup of white sugar *1 teaspoon of vanilla *1 cup of Peanut Butter *5 cups of Cheerios First step: Combine the corn syrup and sugar in a large sauce pan. Then stir it together and bring to a boil on medium heat for one minute. Then remove it from the heat and add your vanilla and peanut butter. Stir until smooth. Next, pour your Cheerios in a large mixing bowl. Then you pour your peanut butter mixture over the Cheerios. Then stir until the Cheerios are evenly coated. Lastly, scoop them out however big you want them and place them on tin foil or wax paper to set up. Enjoy!! So there you have it! Enjoy! I hope you will stop on by my blog and check it out. Thanks for having me, Karen! (:
Ooooh, those look so yummy!  You could also add some Halloween or any colored M & M's and give them for neighbor gifts! I may have to try this:)

 Thanks so much for stopping by Jourdan! 

Wednesday, January 25, 2012

What's for Dinner? Sonoma Chicken Pasta

  via: Brenda's Blog

I have been making this recipe for a year or so.  It is REALLY good.  My family loves it.  I think yours will too!

The best thing in this recipe is Bacon and Artichokes!  I am not a big Artichoke fan, but it is SO yummy in this recipe:


10 oz bow tie pasta (I have also used spiral pasta)
2 slices bacon diced
1 pound skinless, boneless, chicken breast, cut into strips *
1 14.5 oz can diced tomatoes (I used 2 cans)
1 15 oz can tomato paste (I used 1 small can)
1/2 tsp dried rosemary
1 9 oz package artichoke hearts
1/2 cup slice black olives

Cook pasta according to directions. Drain and keep warm.

Cook bacon in large skillet until almost crisp. Add chicken.  Cook over medium heat until cooked through. Stir in diced tomatoes and sauce & rosemary. Simmer for 15 minutes. Add artichokes and olives. Cover and heat through. Serve over pasta.


* I used frozen chicken breasts.  I boil them, then chop them up into bite sized pieces.  (It is faster than thawing them out and tastes just as good!)

Let me know if you try this.  I would love to hear what your family thinks!!

Thursday, December 22, 2011

Crafts and recipe's from Christmases Past!

Some of you may not have been following my blog for long, so I thought I would share some crafts from Christmases past!  Sound good? It's not too late to make some of these!  You still have 3 days:)

Here we go!

I made these cuties a few years ago, when I first started blogging! 
They are so easy and you use a OJ can lid!  How's that for repurposing?
Here's the tutorial on how I did these.  Keep in mind when you are reading the tutorial it was one of my first!

I love these vintage images! Cute, huh?

I love to make these Glass Pendant Necklaces.  They are really easy to make and are a great gift.  You can find tutorials for these all over the internet.

I made this baby last year.  I love it and have it sitting in my living room.  I recommend making the ruffles using this tutorial.


These blocks are simple to make.  Just cut the wood in three different sizes, paint and adhere the vinyl or you could stencil the words on!


More wood blocks!  The tree I ordered from Thoughts in Vinyl.  I added the paint and paper.  The Ho, Ho, Ho blocks I cut out added the paper and cut and added the vinyl myself!  

How about covering a Dollar Tree Composition notebook with pretty scrapbook paper!  Use Mod Podge to glue the paper on, then glue desired embellishments on your book.  Stamp, print or draw ------'s Journal on the front!  Easy and super inexpensive.


Scrapbook paper ornaments.  Another very inexpensive gift to give someone!  Find the tutorial here.

This is one of my favorites!

Yummy Santa Snack Mix!  Just don't eat too much of it while you are making it, like I did!  Find the recipe here.

Lavender Rice Bags.  I actually made these this year!  They were so easy to make!  I love the flannel fabric I found.  You can find the tutorial here.

I hope these gifts can help you with some last minute ideas! 

I may not be around here for a few days, so I wish you happiest of holidays! 

Thank you for reading my blog and making sweet comments.  I appreciate YOU!

Thursday, December 15, 2011

Soft Molasses Cookies

Hi Everyone.  I'm so excited to be guest posting here at Pocket Full of Pink today.  My name is Lee and I blog over at Creative2xmom.  I found a couple of years ago that I just love creating, growing as a mom, and learning new things.  So Creative2xmom naturally grew out of my desire to share with, create with, and encourage other women.

I've been married for over 10 years.  Wow!  That makes me feel old.  Ten years of being married to an awesome man who puts up with, and actually encourages, my craziness.  We have two wonderful little children.  Noah just turned six years old in Oct, and Lydia will be four on Dec 21st.  These two little ones keep my busy, but I find myself growing so much more with them in my life.  The days are long, but the years fly by.


And although I'm an only child, I come from a big involved family which got me thinking about How to Build Strong Extended Family Relationships.  This has really been a tough year and I don't know where I'd be without them.

Some of my other favorite features on the site have been:
52 First Dates--an exercise in strengthening your marriage
Rhythms of Grace--women sharing their real life stories of triumph
Stewarding your Story--Why and how to tell your testimony
and all the fun craft, food, and party ideas coming along each day.


But enough about me.  Let's talk COOKIES!

These soft molasses cookies are very dear to my heart.  Growing up, my grandma was known for her handiwork in the kitchen.  Being in Grandma's kitchen was like finding that warm place in your heart to call home.  Soft, gentle, and smelling of vanilla, my grandma always had a big hug for you and a rolling pin to keep your hands busy.  Every Christmas she'd whip up a hot batch of these molasses cookies and my mouth would water, waiting for them to come out of the oven.

As my kids grow now, I make these cookies once a year, .... every Christmas, .... just like Grandma.  And every Christmas I find myself back in the memory of my Grandma's kitchen waiting for a warm cookie and a soft hug.

Soft Molasses Cookies

You'll need:
1/2 c butter, softened
1/2 c shortening
1 1/2 c sugar
1/2 c molasses
2 eggs
4 c flour
1/2 tsp salt
2 1/4 tsp baking soda
1/2 tsp cloves
2 1/4 tsp ginger
1 1/2 tsp cinnamon

*Cream together butter, shortening and sugar until fluffy.

*Beat in molasses and eggs, set mixture aside.

*In another large bowl, combine flour, salt, baking soda, ginger, cloves, and cinnamon.  Blend thoroughly with wire whisk.

*Gradually add flour mixture into creamed mixture until blended and smooth.

*Form 1 in balls: dip tops into sugar.  Place 2 in apart on greased cookie sheet.  Bake at 350 degrees for 10 min.  Do not over bake.

*Allow to cool slightly on cookie sheet then transfer to a wire rack.

I hope you enjoy these as much as we do.  And have a wonderful Christmas!


Those look so yummy!  Thanks for sharing them Robin:)  Stop by and check out her blog!

Friday, December 9, 2011

Stovetop Potpourri {Tutorial}


Hi!  I am so glad to be visiting today at Pocket Full of Pink. What a great blog this is!? A big thank you to Karen for giving me this opportunity to do my first guest post!


I am Katie from Creative Outlets of a Thrifty Minded Momma.  I started this blog about 3 months ago in an attempt to stay sane in this crazy house of mine  I have been married 5 years to my high school sweetheart and we have 2 blonde-haired-blue-eyed beauties, affectionately named Boog (3) and Bear (2).  I have a bunch of different balls to juggle and blogging seems to be the best way for me to keep them all up in the air.


One fact... I don't cook well.  I am a cliche beginner.  So I find it ironic that I am sharing something with you that I did on the stove.  Fortunately for the world, no one has to eat it :)


Turn Up the Homemade Stovetop Potpourri!


When my husband and I first started dating (November...10 years ago, ahhh) I remember going to his parents house for the first time.  It was Christmas time (and that is no joke in this household!) So when I say that it was decorated for Christmas, that is an understatement.  Place about 10x more emphasis on decorated and you might be closer :)


I loved it.  I mean, we decorated for Christmas growing up, but not like this.  The one thing  that stood out to me most was the smell.  It was like Heaven in December and I haven't kicked off the holiday season without that smell since. It marks the beginning of the holidays for me.  Isn't it funny how a smell can bring such a rush of feelings?


Here is how easy it is...


Get together some whole cloves, cinnamon sticks, apples, and oranges.

*Since you won't be eating it, check the dollar store for cinnamon sticks and use those- it's cheaper and you don't have to feel bad about adding a bunch of extra!


Slice your apples and oranges and plop them in the pot.  No need to be fancy here.  This is how I usually get them in pieces :)


Fill up the pot with water.  Just make sure to leave enough room for the water to boil a little!


Being the inexperienced cook that I am... I didn't know what whole cloves were nor what they looked like. (I was even worse 10 years ago  But they are very easy to find in the spice section of any grocery store.


Add in your cloves and cinnamon sticks.


Turn your stove to medium high and wait for the bubbles to start.  **note to self, clean oven knobs before next guest post**


Once it starts boiling, turn it down to LO and let it simmer all. day. long.


Add a new stick of cinnamon and a few cloves every now and then.  Throw in the remains of all those apple and orange snacks. Let it sit.  You don't have to change it out every day  or even every week.

Here is what mine looks like after 2 weeks.  Trust me though, it gets even better with time!


Some basic rules of thumb that I have figured out:

*It's all flexible... leave out the orange, add some extra cinnamon, add some lemons and allspice.  Whatever you want.

*The higher the heat = more steam = more smell.  Just make sure to add water more often. You will smell burnt cinnamon when it gets too low!

*Don't do this every day for an entire month.  While your house will smell wonderful, your electric bill probably won't!  Don't ask me how I know...


Maybe one day this smell will welcome the holidays into your home for you and your family like it does mine.


Thank you, again, to Pocket Full of Pink for having me and please stop by and visit me sometime.  Take a look around and leave a comment or two... I would love to get to know you!


-Katie


Thanks for stopping by Katie!  I want to try this Potpourri!  Can't you just smell it?  Love it during this time of year. 

Wednesday, August 10, 2011

Homemade Wheat Bread recipe- Easy!


I am going to be honest with you.  I am not a fabulous homemaker, I have only been making this bread for about 2 years now, but I am hooked (along with my family) and my kids actually like this bread better than store bought now.  It is delicious!

I always thought making bread from scratch was so time consuming and that it took some kind of magic to get the bread to rise, but trust me, this bread is yummy and it works for me every time! 

 The friend that gave me this recipe uses a Bosch Mixer with a dough hook, but I don't have one, so I make it by hand and it's not bad AT ALL!

Let me share the recipe with you:

Yummy Wheat Bread 

In the mixer combine and mix on speed 2 until well blended:
1 C hot tap water and 2 TBSP of yeast to soak for 5-10 minutes then add to:
5 cups Hot tap water
2/3 C. oil (I use canola)
2/3  Honey or Molasses  (I have used both and they are both fantastic!)
4-6 C. Freshly Milled Whole Wheat Flour

Switch to speed 1:
Add 2 TBSP salt (always add salt, it helps with the rising)
Add slowly 6-10 cups Whole Wheat flour while kneading (I usually use half wheat and half white flour)
Sprinkle in the last of the flour 1/4 cup at a time.  When enough flour has been added, the dough pulls away cleanly from sides of bowl.

Knead:  on speed 1 another 5 minutes
Shape:  Into loaf pans and let rise until the dough doubles in size. (usually I fill 5 bread pans and let it rise for about 60 minutes covered with a dish towel)

Bake: 350 for 30-40 minutes (mine take 30 minutes)
Beautiful!

Again, you DON'T need a Bosch Mixer to make this.  I do it by hand!  You can do it!!  
If you have any questions, don't hesitate to e-mail me:  kweight@byu.net.
Related Posts Plugin for WordPress, Blogger...