This week I am going to show you how to make a super easy Santa Bag.
ou |
| No, Santa didn't come early...she got a pillow |
I saw a bag like this in Pottery Barn's catalog and thought it was crazy how much they would charge. I would much rather make it myself, with a few imperfections, but have the memory of making it for her year after year. So here we go!
Supplies:
Material for the bag, the size bag you want will determine the amount of material. I bought 2 yards but only used 1yd per bag and it is plenty big.
2 yards of rope, I did use the full 2 yards for one bag
Fabric for lettering, .5 yard
Hot Glue
Heat and Bond
Scissors
Pins
Band aids :)
Let me start off by saying this bag is actually the first thing I have made on my sewing machine since I got it. I haven't sewn since middle school so I was a little rusty and unprepared.
Start off by cutting your fabric into two equal pieces. I just laid mine in half and left the bottom attached...hey first time sewing in a while!
Make sure you lay your two pieces with the two outside pieces facing each other. Pin around the edges to sew, or just hold them together if you don't have pins and it is way too cold to go to the store : )
Sew along your bottom piece first with a 1/4 seam.
Then go up each side, again with a 1/4 seam, but stop 2 inches from the top.
Once the sides and bottom are done, turn right side out. Now flip down your top to make the pocket for the rope to go through. Sew the bottom down, make sure not to sew the edges shut, that is why you stopped 2 inches before the top. You should have an opening on both sides. I like to see the rope on each end.
Take your rope and attach a safety pin to the end and slide it through the pocket...if you can't find a safety pin the end of a screwdriver pushes it through nicely as well...I am crafty and resourceful!
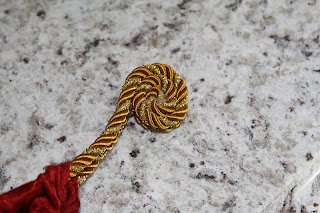
Once the rope is through bring the two edges together. Get your hot glue and glue them together. I made myself a little curl to jazz it up! You should now be able to cinch your drawstring shut smoothly.
Now onto the lettering. Take your heat and bond, or whatever fuseable webbing you would like, and iron it onto the BACK of your fabric.
You can now get fancy with your lettering. If you received smiley faces and check+ in elementary school writing you could probably free hand a really nice letter, well that was NOT me so I rely on my Cricut to do all my letters! I pop that fabric in there and let it cut it out for me.
Once you have your letters cut out, whatever way you did it, lay them out on your bag. Make sure you pay attention to where they will lay when the bag is cinched or filled with goodies, you don't want the name to disappear.
Once you have it all laid out, iron it on and BAM Santa bag!!
Make sure you leave it out for Santa to fill with all the
Thanks for letting me share my Santa Bag with you. I hope you enjoyed it. If you ever have any questions about my tutorials feel free to email me or visit my page and contact me there!
Isn't Kalyn fabulous? I love her blog and all the fantastic crafts she makes! I am so excited to have her on my blog monthly!


No comments:
Post a Comment
Thank you so much for your comments...I love them!!