Showing posts with label rosettes. Show all posts

Tuesday, August 7, 2012

Yellow and Grey Live Simply frame with Washi Tape!

The other day I was having crafting withdrawals!  I got a bunch of supplies out and got started crafting!

Here's what I came up with.  I had this frame from a few years ago when my favorite craft store was closing.

Here are the supplies you will need:

- frame with glass
-washi tape
-vinyl lettering
-fabric (you can use scraps for this)
-hot glue

I ordered my vinyl from Fingersnapper.  I got the washi tape a few years ago from Pick Your Plum.  The fabric I had on hand.  I made the rosettes a few months ago from another project and never used them, so this project took me about 1/2 hour total!  Yay!!

This project was so easy, I didn't take step by step pictures, but here is what I did.

1.  Adhere Washi tape around the frame. Easy!  I just kindof eye balled it:)

2.  apply the vinyl.

3.  glue on the rosettes. (here is a tutorial if your not familiar how to make these.)

DONE!

See what I mean?  Super EASY!  Love those kind of projects!!  
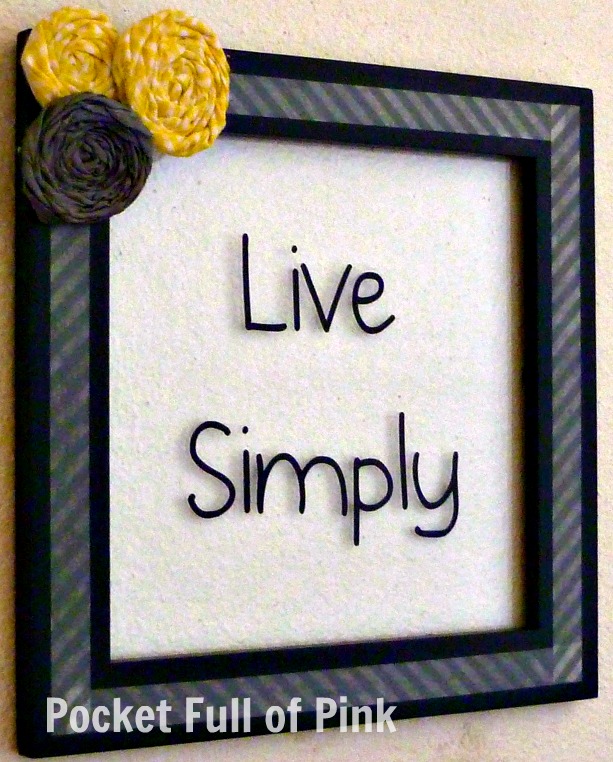
I just love the grey, yellow and black together.  Don't you?

Would love to hear from you!  Leave a comment and let me know what you think.

Friday, April 8, 2011

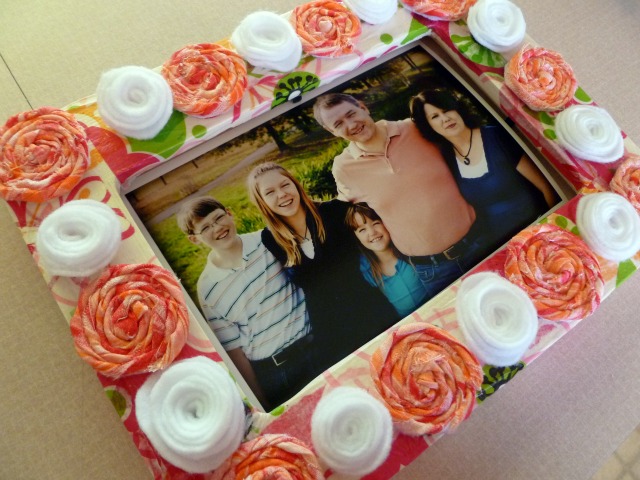
Mod Podged Frame with felt and fabric

I am looking for crafty people who would be interested in being a guest blogger!  If you are crafty, sew, or cook, and think you would be interested in doing a tutorial, share a recipe, etc. , please e-mail me at kweight@byu.net.  I would love to have a guest blogger once a week. I look forward to hearing from you! 

I love when you can make a craft for about $2!  I bought the frame a few months ago at Michael's, the tissue paper at Walmart and have a TON left, I had the fabric and felt already on hand.

Here is what you need:

Wood frame from $1 section of Michael's or other craft store
Tissue
Mod Podge
fabric
felt
picture
glue gun

I sanded my frame a little and painted it light Ivory.

I just painted one coat of paint.
Next, I ripped lots of strips of the tissue in different sizes. 
Now is the messy part!  Start sponge brushing Mod Podge all over the frame and press pieced of tissue all over the front and sides.  Sometimes I had to rip the piece to make it fit well.  No biggie.  It will look great no matter what.  You can't really go wrong with this!
I let the frame dry in the sun (yes, we actually had some today!).  It took about 1/2 hour.
This is where I fit the picture in and made sure all the flowers fit well on the frame before I glued them all down.

Here it is all finished and in my garden window!  I really love the tissue underneath.  It gives the frame a little more POP of color.  

Today has been such a beautiful day!  The sun is out and the trees are blooming!  It's amazing what a great mood the sun can put me in:)

I am linking up to these parties:
Fingerprints on the Fridge
Shanty 2 Chic 
Sassy Sites 
Spunky Junky 
Tatertots and Jello 
Mad Skills Party 
C.R.A.F.T. 
Craftoholics Anonymous 
Creative Crate 
Craftomaniac

Wednesday, February 9, 2011

Love Rosette Frame and Bumper Sticker Winners!!

Thanks so much to those of you who responded to the Bumper sticker giveaway.  I know it's not much, but they will sure look great on your Bumpers!  I will e-mail the first 10 people who responded and told me why they LOVE blogging to get your info. 

Now....onto my latest craft project!

I had a 5 x 7 frame laying around and I wanted to use it. I went to Target and bought card from the dollar section. 

The card fit perfectly!  I had bought a cute mini wreath at Joann's a few weeks ago ($2.99), but didn't know what I was going to use it for.  Well, I figured it out!  I hung it from a cute Robin's egg colored polka dot ribbon (that came on some wash cloths I bought recently).

 Lastly I had to add some adorable rosette's on the bottom right hand corner of the frame.  I made two small ones from the left over ribbon which I hung the mini wreath with, and used some left over fabric I had from a project a few months ago.  Sweet:)  Total cost: $4.  The price was right and I loved how it turned out!  
Super cute, huh?  I just love the Robin's egg ribbon.  Sooooo pretty and repurposed!  I love to reuse stuff:)  It's kinda Valentiney, but I think I could leave it up all year, don't ya think?

Friday, February 4, 2011

Fabric Heart with Rosettes

My original plan was to have a Giveaway today, but I need to delay it for a few days....trust me, it's gonna be really good!  It will be worth the wait.  I promise.

I made this lovely heart a few days ago.  I found the tutorial here.  She has such a lovely blog with lots of fun ideas!  Some people are so dang creative. I just luuurve the name of her blog too....
I love how it turned out.  It only took me something like 30 minutes!  of course I HAD to add a few of the cute rosettes.  So easy and it was fun to make:)
I know my walls are so bare and soooo white!  Actually it's kindof a dirty white.  I need to paint them REALLY bad.  That is my goal during spring break this year.  I just need to figure out what colors to paint them.  Any ideas???
That's one of those cute little felt flowers in the center.  SUPER easy:)
Notice my fabulous Valentine's day Subway art!  I LOVE it.  I really love that shelf too.  My hubby made it like 15 years ago (when cut out hearts were all the rage!).  I can't part with it since he made it for me, so I spray it a different color every 6 months or so.  This is my favorite color. Antique White. I think it will look better up there when my walls are a different color!  Sorry.....rambling again.
Related Posts Plugin for WordPress, Blogger...