Showing posts with label $1 wood frame. Show all posts

Tuesday, April 3, 2012

Spring Projects {from the past}

 Hello my friends!  It's Tuesday and school is already taking over my life!

I am taking 12 credits this term and I think it's going to be VERY crazy for the next 10 weeks!

I am sorry to say something has to not get as much of my attention and it can't be my family or school, so therefore, it will be the blog. 

It kills me to be flaky, but I am need to get good grades and get done with school!

I hope you all understand.  You won't see much of me for a while. 

oh, I am not going to disappear completely, but I won't be here everyday or even every other day.

I love you guys and you are such a support to me.  Thank you for all your sweet comments and for building me up!

You all are the best:)  

Now, onto some past Spring projects that I thought I would share with you in case you have missed them!!

 Spring Flower Wall Art


Thanks for stopping by today and I hope to hear from you!
 

I will still be stalking all of your FAB blogs!!!

Friday, April 8, 2011

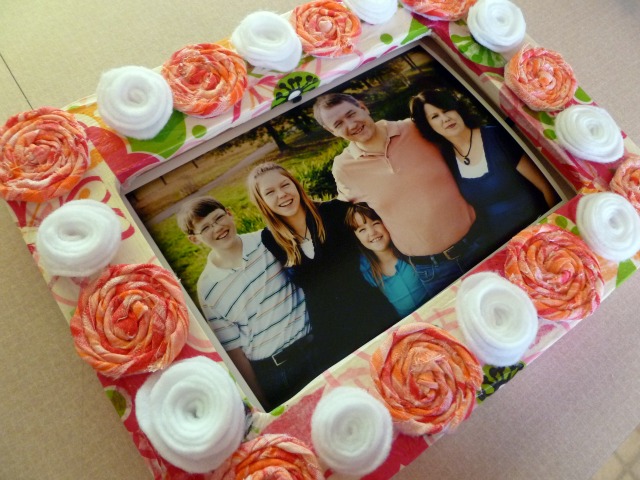
Mod Podged Frame with felt and fabric

I am looking for crafty people who would be interested in being a guest blogger!  If you are crafty, sew, or cook, and think you would be interested in doing a tutorial, share a recipe, etc. , please e-mail me at kweight@byu.net.  I would love to have a guest blogger once a week. I look forward to hearing from you! 

I love when you can make a craft for about $2!  I bought the frame a few months ago at Michael's, the tissue paper at Walmart and have a TON left, I had the fabric and felt already on hand.

Here is what you need:

Wood frame from $1 section of Michael's or other craft store
Tissue
Mod Podge
fabric
felt
picture
glue gun

I sanded my frame a little and painted it light Ivory.

I just painted one coat of paint.
Next, I ripped lots of strips of the tissue in different sizes. 
Now is the messy part!  Start sponge brushing Mod Podge all over the frame and press pieced of tissue all over the front and sides.  Sometimes I had to rip the piece to make it fit well.  No biggie.  It will look great no matter what.  You can't really go wrong with this!
I let the frame dry in the sun (yes, we actually had some today!).  It took about 1/2 hour.
This is where I fit the picture in and made sure all the flowers fit well on the frame before I glued them all down.

Here it is all finished and in my garden window!  I really love the tissue underneath.  It gives the frame a little more POP of color.  

Today has been such a beautiful day!  The sun is out and the trees are blooming!  It's amazing what a great mood the sun can put me in:)

I am linking up to these parties:
Fingerprints on the Fridge
Shanty 2 Chic 
Sassy Sites 
Spunky Junky 
Tatertots and Jello 
Mad Skills Party 
C.R.A.F.T. 
Craftoholics Anonymous 
Creative Crate 
Craftomaniac
Related Posts Plugin for WordPress, Blogger...